Milestones#
Milestones provide a convenient way to organize and group your test runs according to significant events within a project's lifecycle (major deliverables or releases).
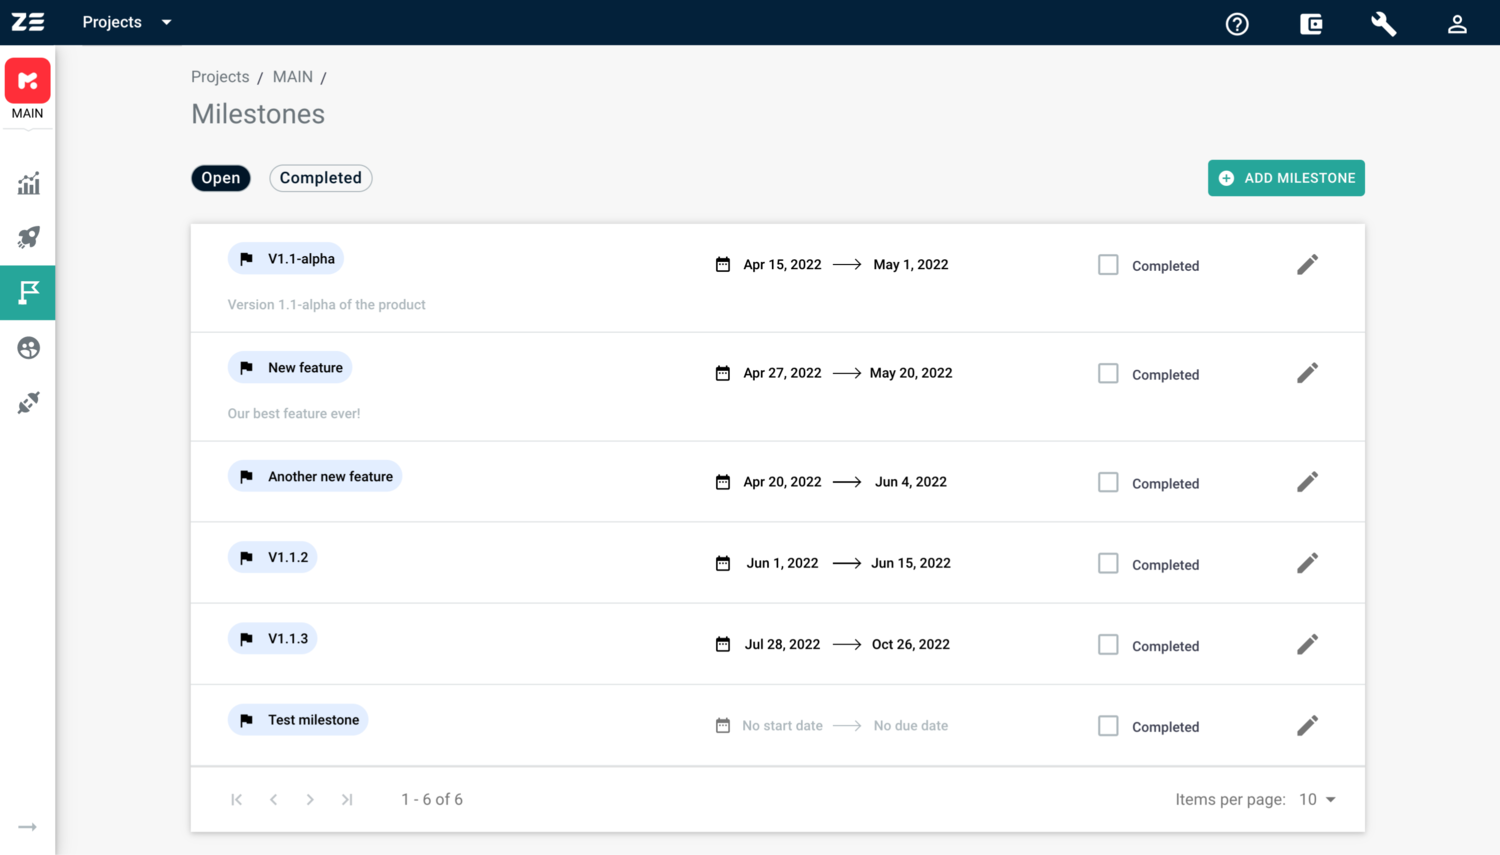
From the Milestones grid (can be accessed via the navigation sidebar), you can see the list of all milestones in the project with key details like:
- Milestone name
- Milestone description (optional)
- Start and due dates (optional)
- Milestone status (Open or Completed)
Managing milestones#
Info
You need to be a project Administrator/Manager or an Admin of the workspace to manage milestones
Creating a milestone#
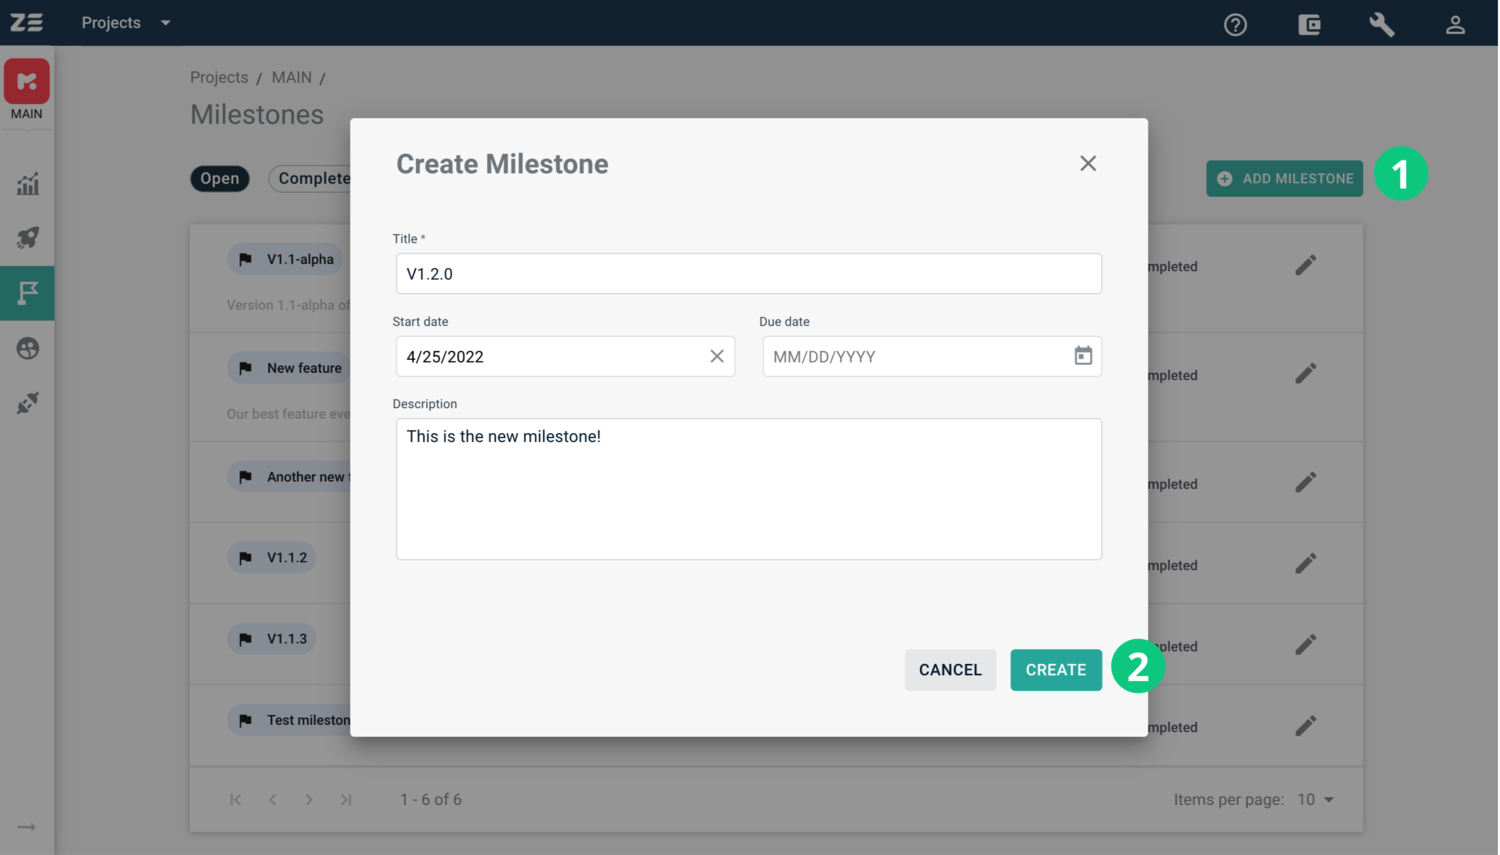
To create a milestone, perform the following steps:
- Access the Milestones grid via the navigation sidebar
- Click Add milestone, the Create milestone dialogue will appear
- Specify the milestone title. It must be unique within the project
- (Optional) Provide the start and due dates of the milestone (the start date can’t be later than the due date)
- (Optional) Provide the milestone description (up to 500 characters)
- Click Create
The milestone will be added to the list of milestones with the default sorting by Due date (milestones with the most recent due date are on top of the list).
As for the milestones with no due date, they are sorted by creation date, with the most recently created ones on top of the list.
Editing and deleting#
To edit an existing milestone, perform the following steps:
- Access the Milestones grid via the navigation sidebar
- Click Edit icon to the right of the milestone you’d like to edit, the Milestone Settings dialogue will appear
- Apply the necessary changes to the fields
- Click Save
The changes will be automatically applied.
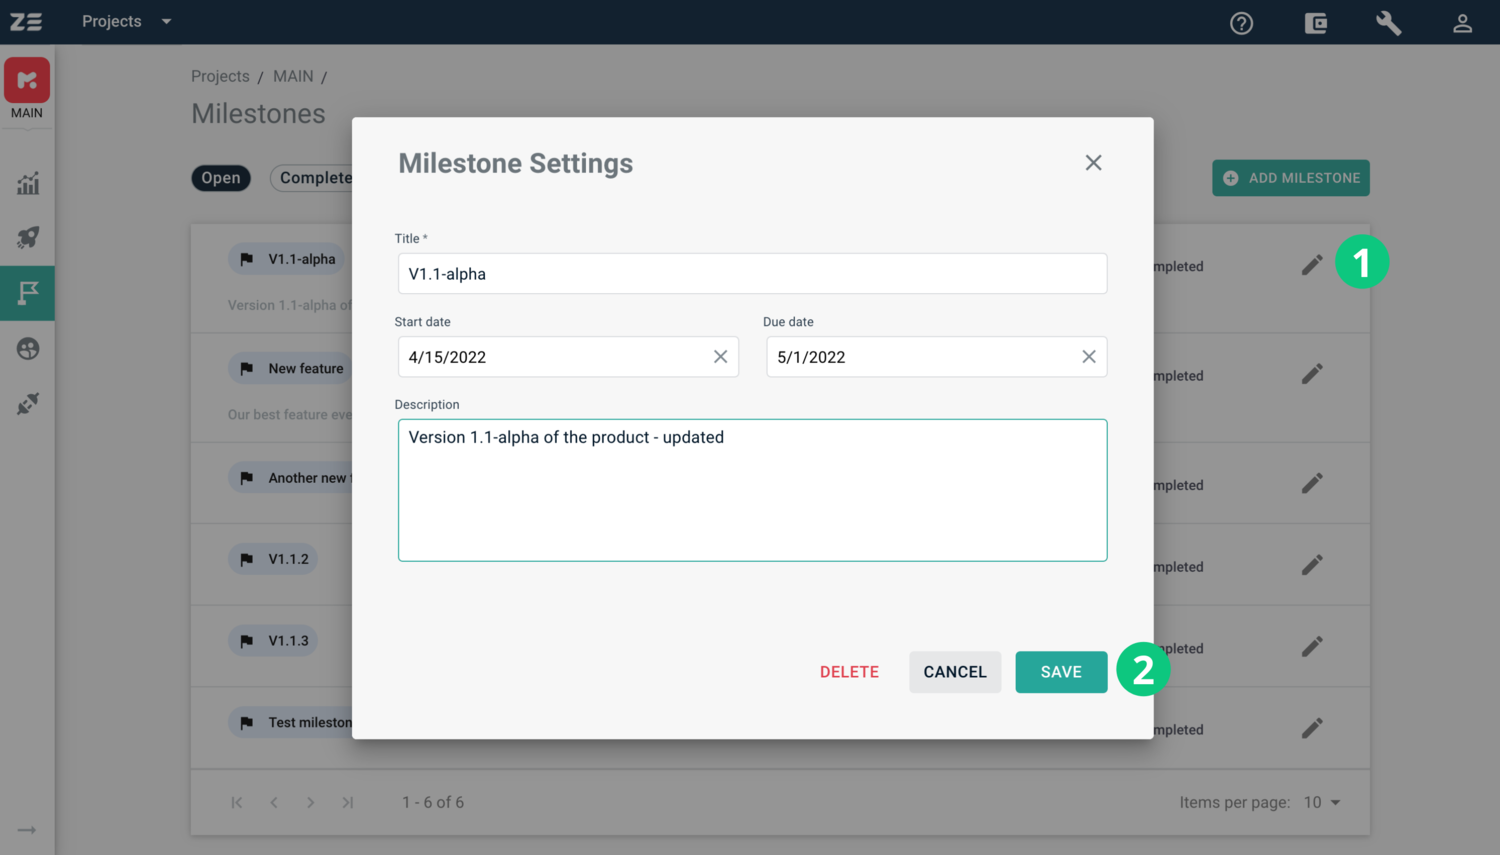
Deleting a milestone is available from the Milestone Settings dialogue as well. Click Delete at the bottom of the dialogue, confirm the action. The milestone will be removed from the Milestones grid, all the test runs assigned to this milestone will be no longer associated with it.
Marking as completed#
You can mark a milestone as completed. For this, click the checkbox to the right of the necessary milestone. The milestone will be automatically moved to the Completed milestones group.
You can reopen the milestones by clicking the same checkbox.

Grouping test runs into milestones#
Note
There are several conditions that should be taken into account when assigning test runs to a milestone from the Test runs grid:
- At least one milestone must be created in the Milestones grid
- Only Open milestones are displayed in the list while assigning a milestone
- Anyone except for users with Guest permissions in a project can assign test runs to milestones
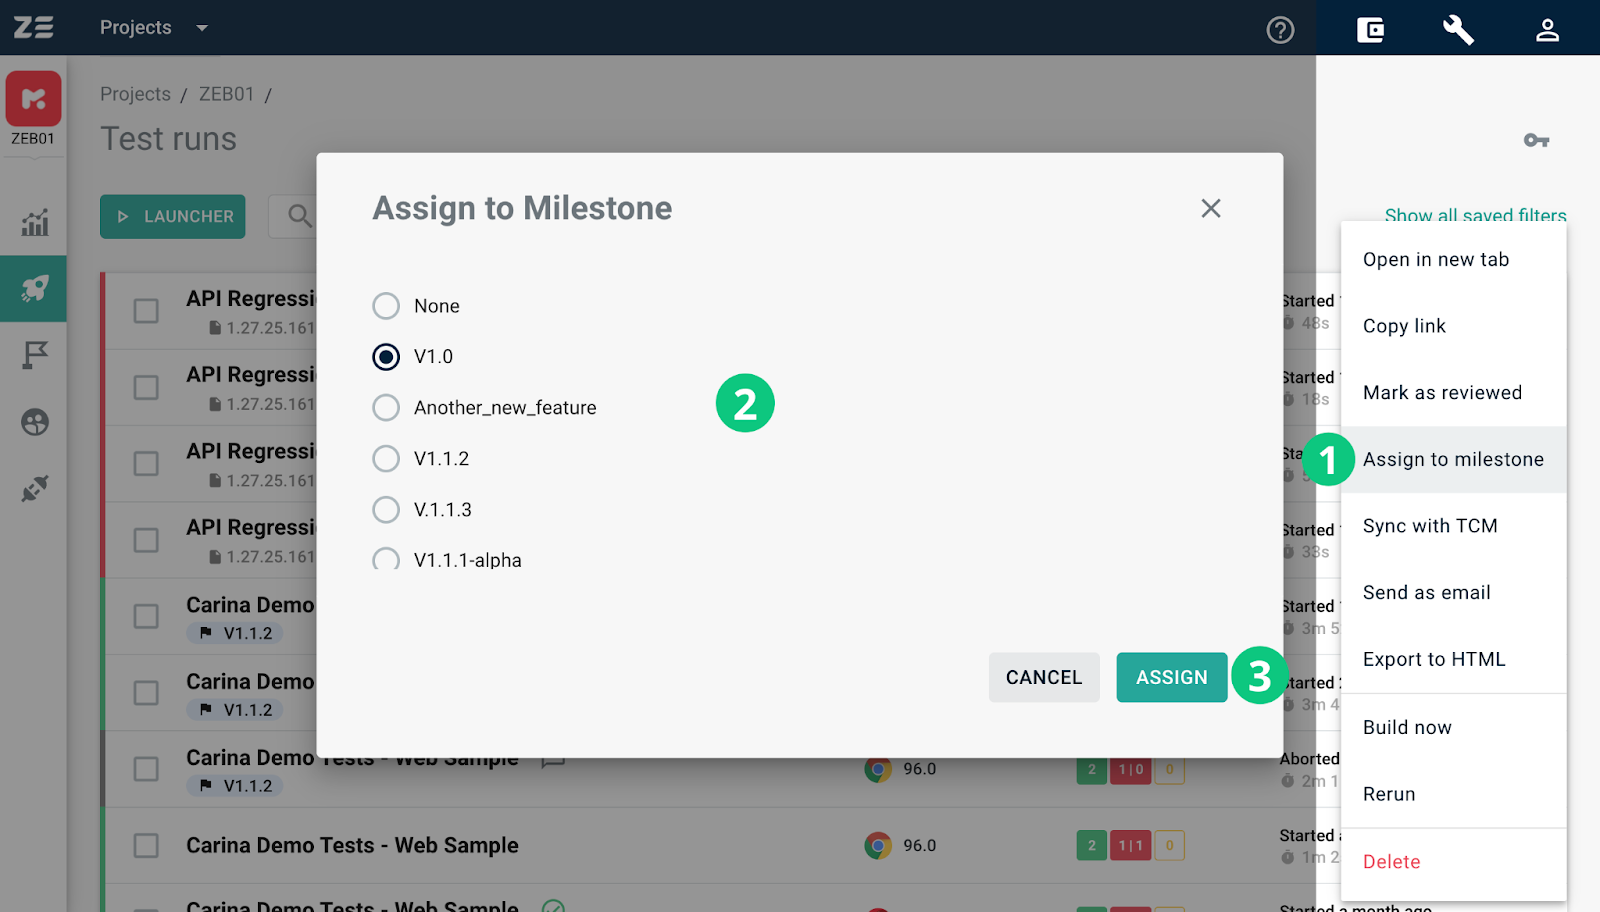
To assign a milestone to a test run, perform the following steps:
- Navigate to the Test runs grid of the necessary project
- Select a test run and go to More Options on the right
- Select Assign to milestone, the Assign to milestone dialogue will appear
- Choose the milestone to assign from the list and click Assign
A icon together with a milestone name will be displayed below the test run name. You can then filter the test runs by milestone to view all the test runs associated with a milestone.