Dashboards#
Dashboard is a collection of widgets with main analytical info on your test run results.
Widgets are graphical control elements that analyze your automation test results, provide detailed test execution statistics and other important data. Widgets can be added to a dashboard from templates, allowing you to customize the widgets with the help of different filters (e.g. you can add a widget with pass rate for Chrome browser only based on statistics for 30 days).
Dashboard types#
There are 2 types of dashboards in Zebrunner:
- System (default) dashboards
- System dashboards are automatically added to each project, contain the basic widgets with info on your test project status and cannot be deleted or edited. General dashboard is available from the Dashboards grid, while Personal and Failure analysis dashboards can be accesses through the General one.
- User-defined (custom) dashboards
- Custom dashboards can be created manually and filled in with a set of widgets that can be configured from templates with multiple filters.
Widget types#
There are 3 main types of widgets illustrating different aspects of testing: automation results, root cause analysis and engineering performance widgets.
- Automation results widgets
-
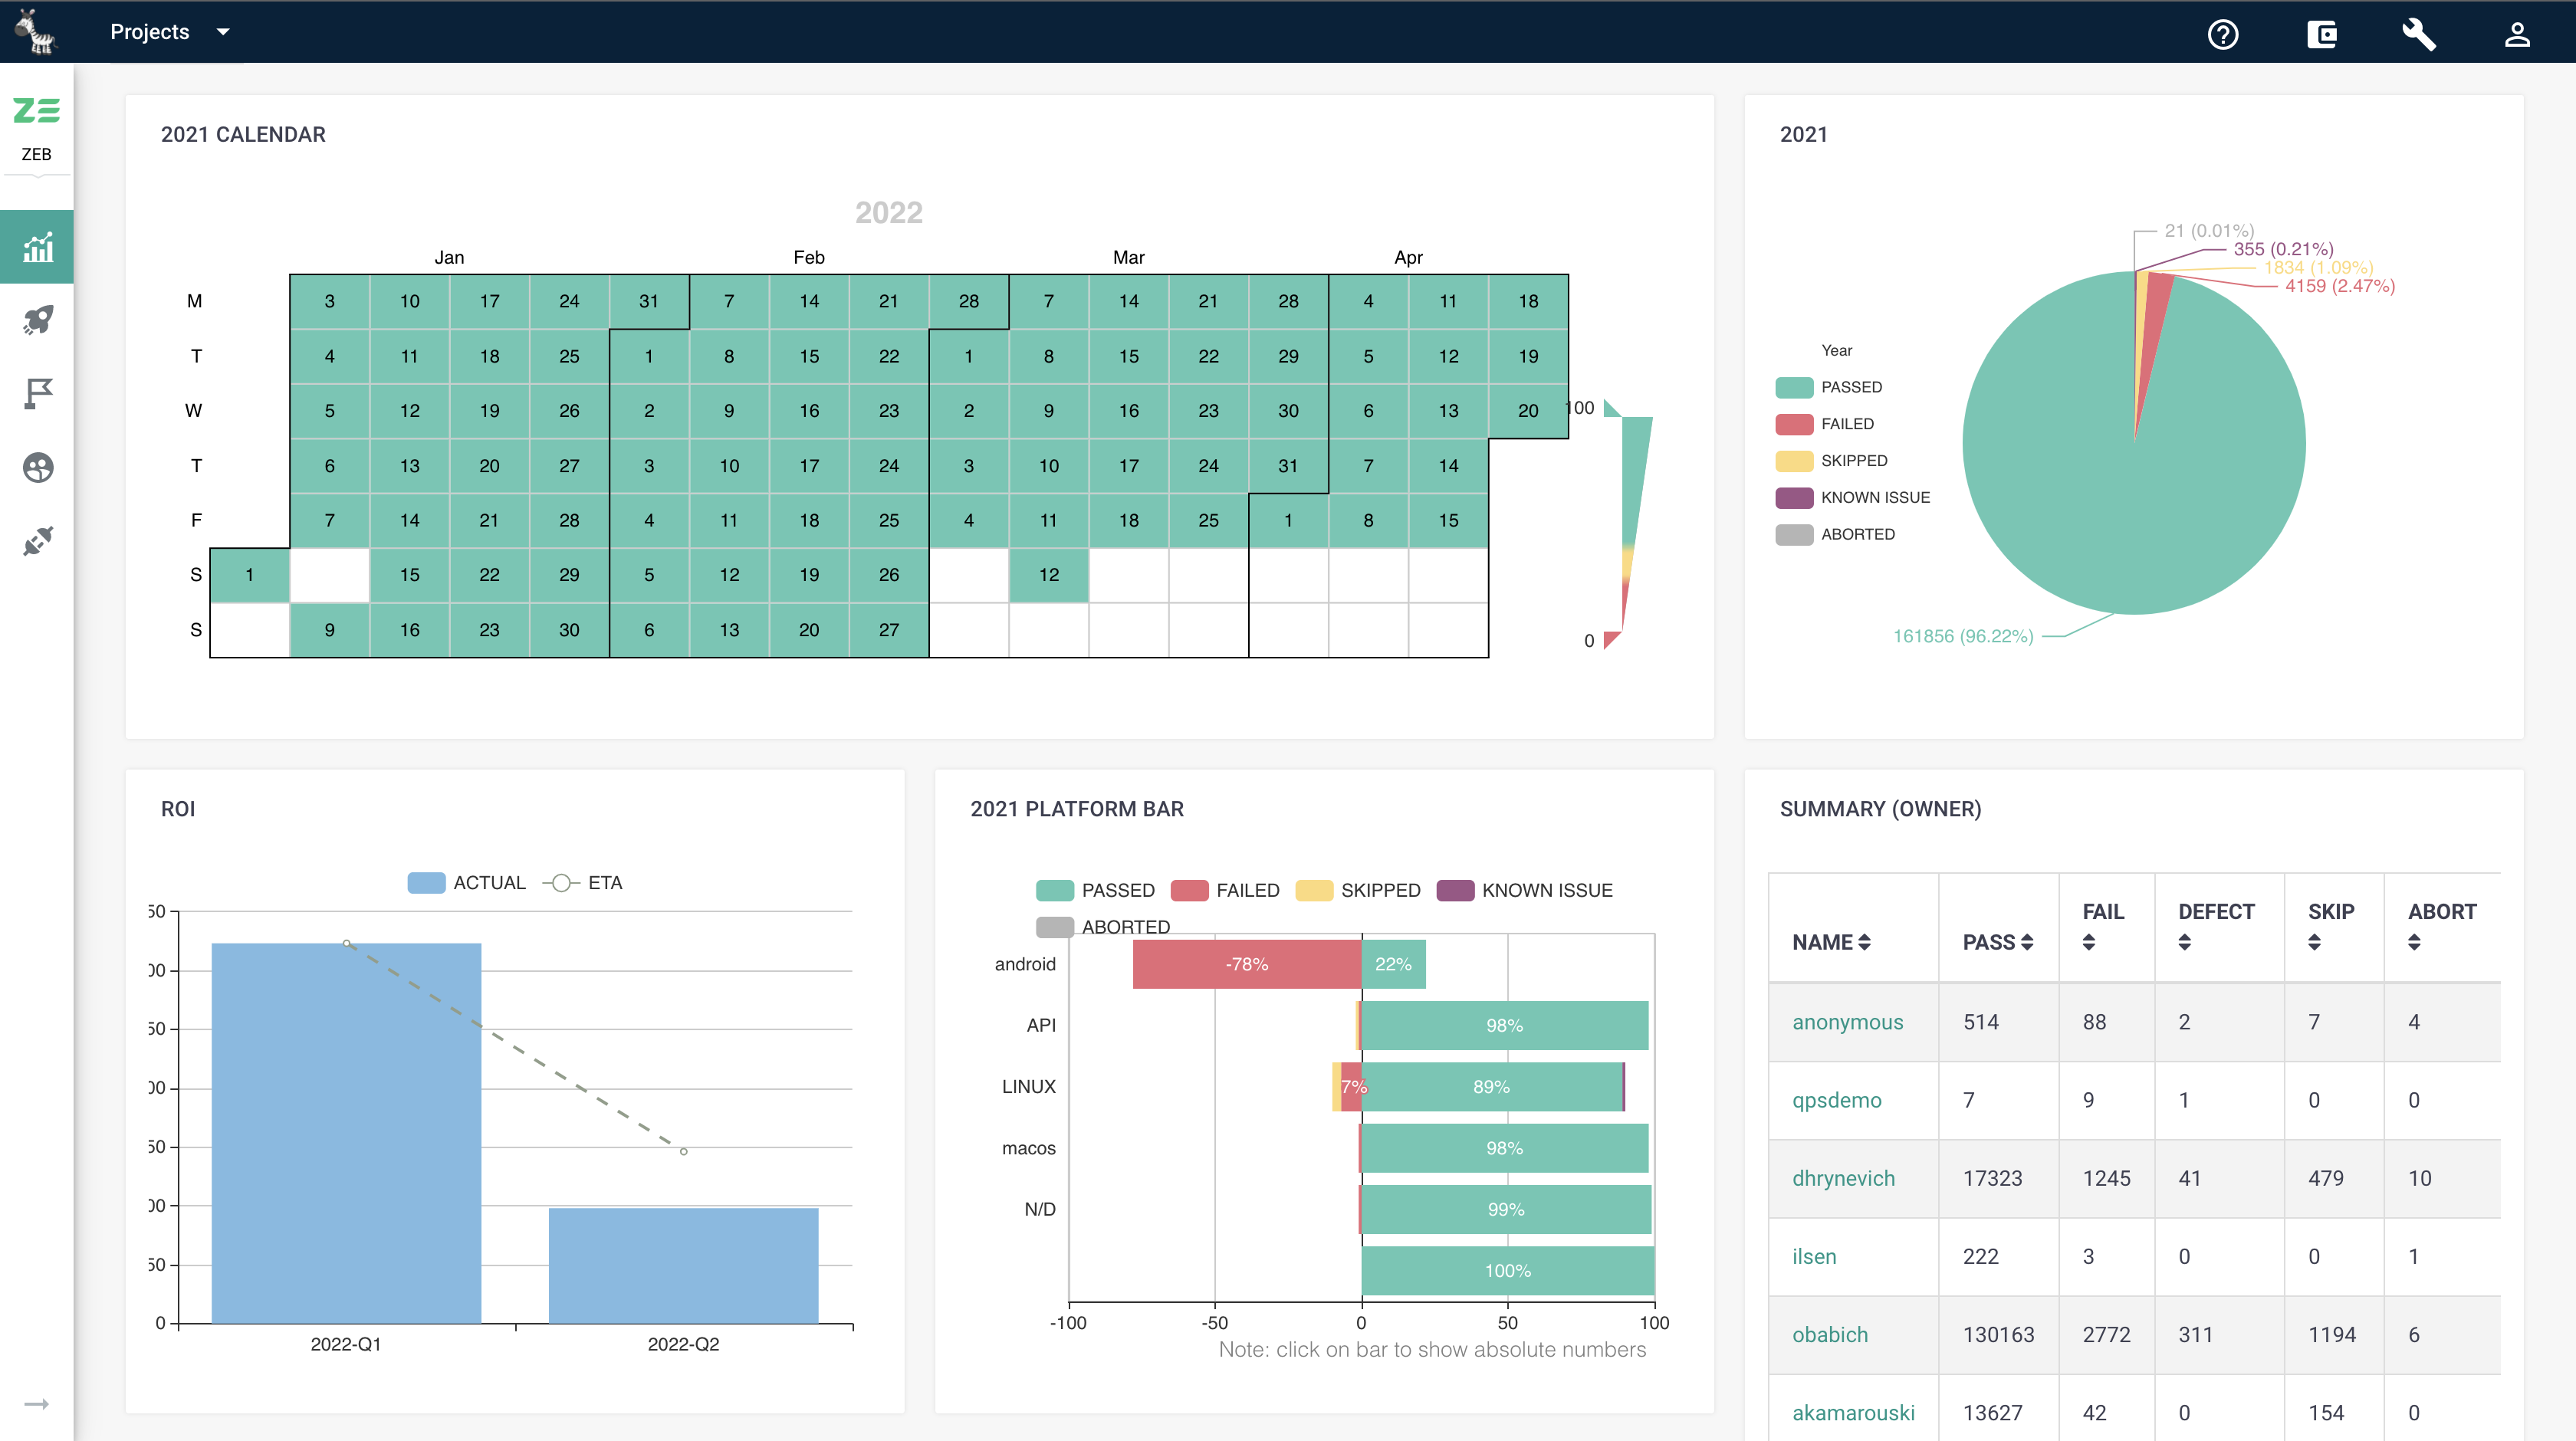
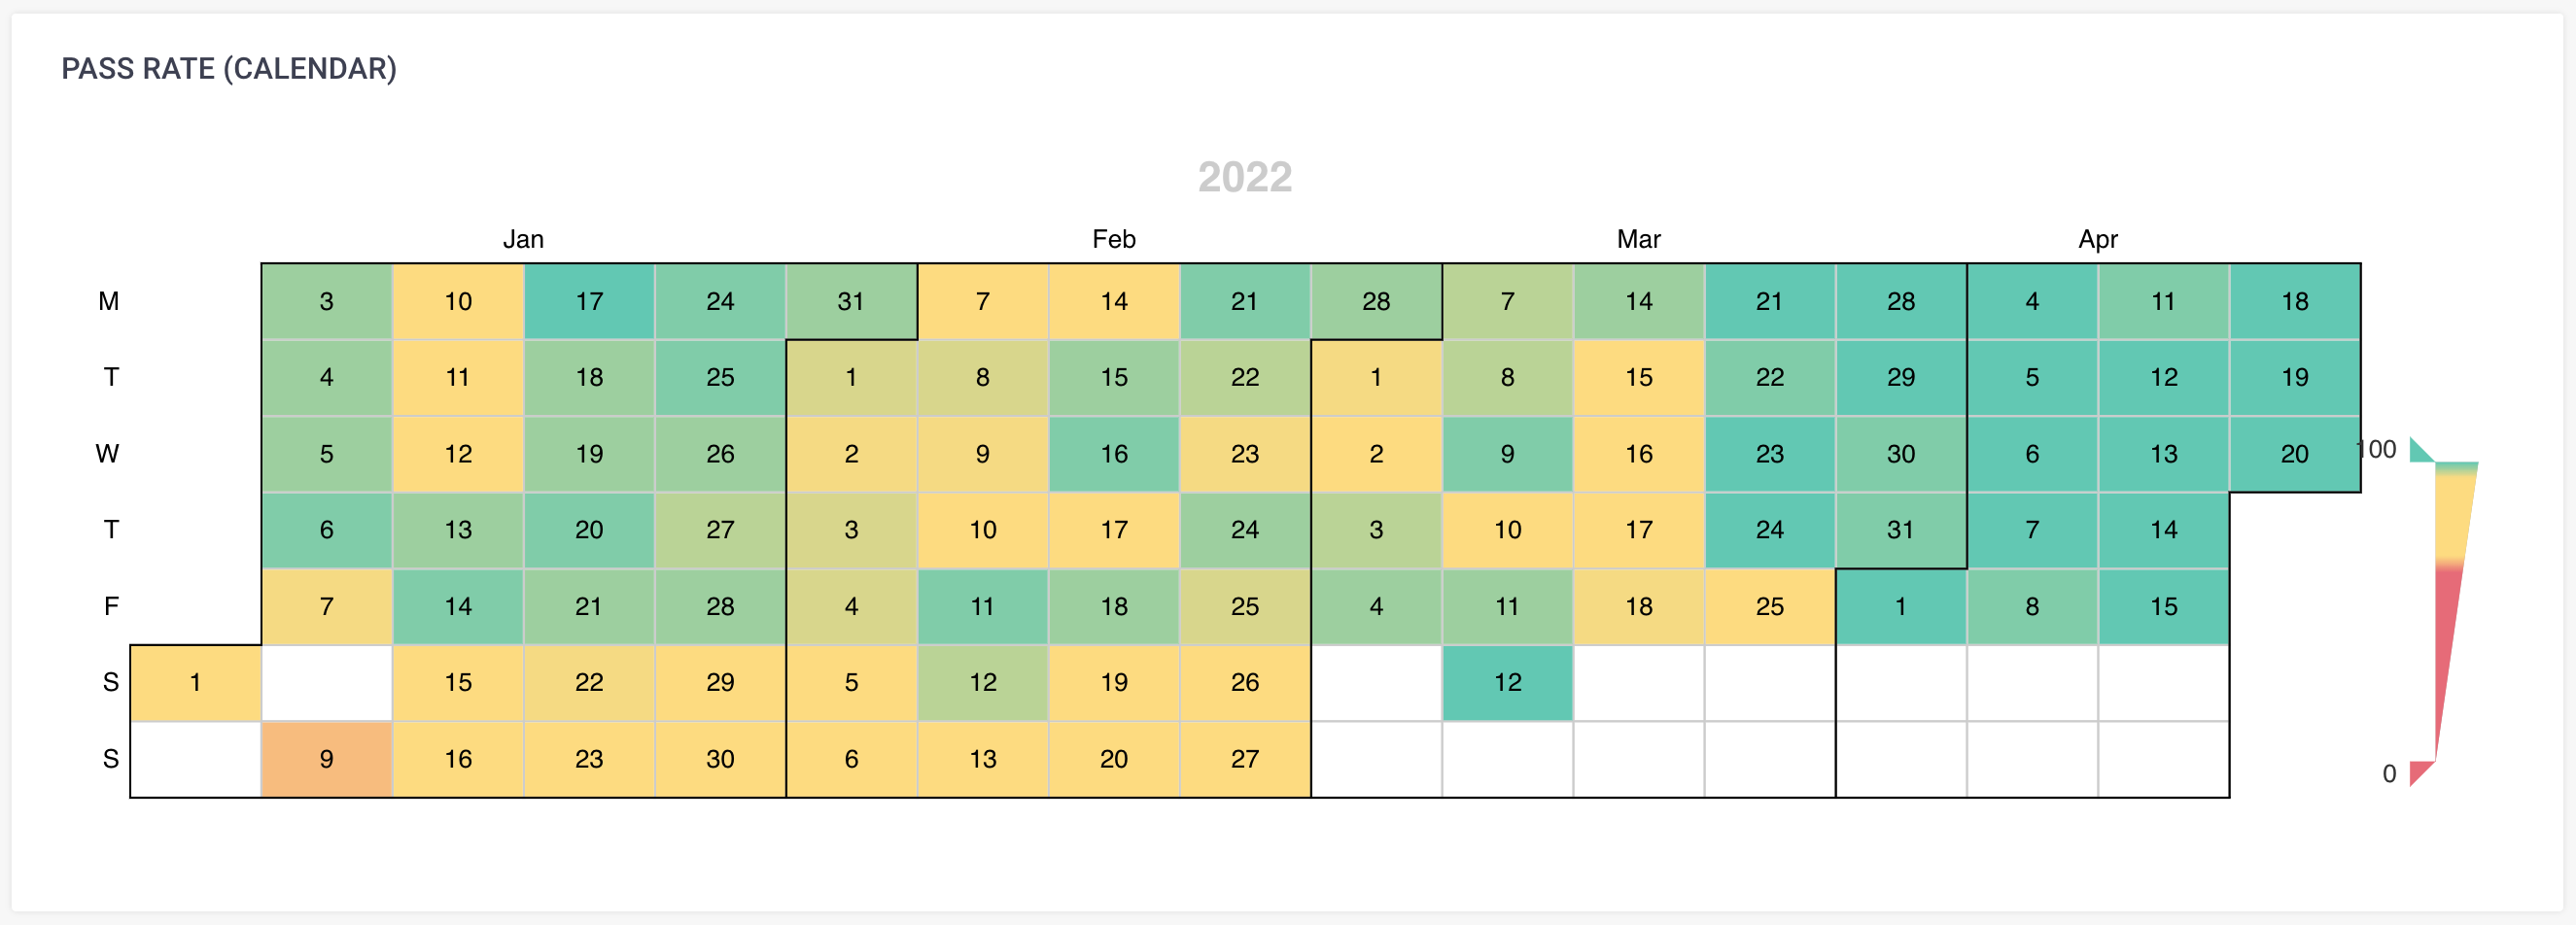
Automation results widgets display the pass rate trends for a selected period, e.g. how many passed, failed, skipped, aborted tests or tests with known issues were detected by the system.
- Root cause analysis widgets
-
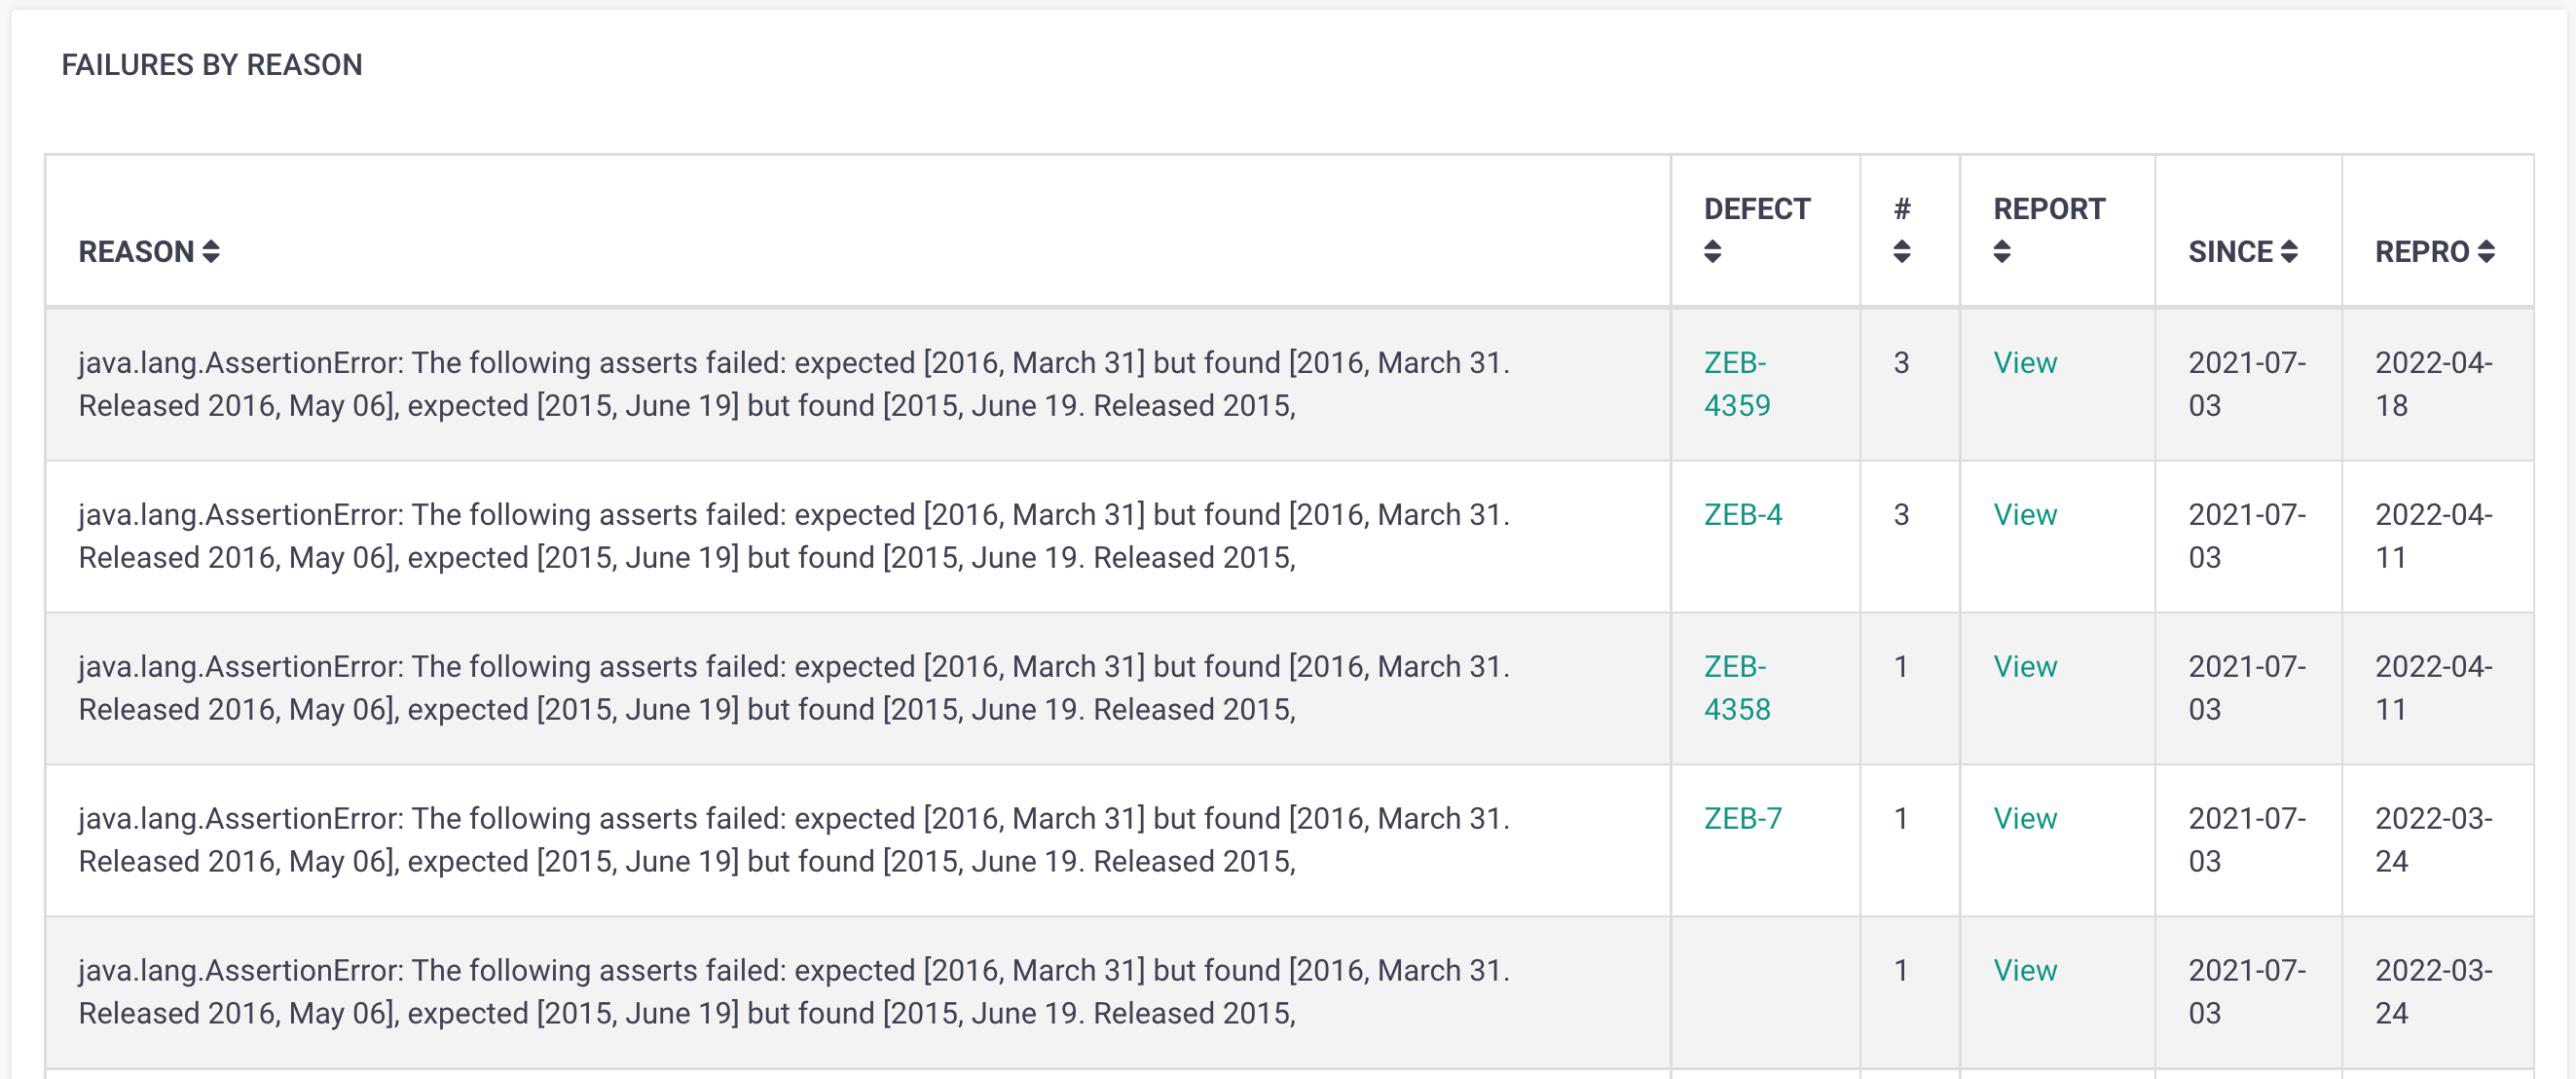
Root cause analysis provide quick access to identified failures grouped by reason and known issues if there were any.
Failure attributes like the number of failures with the same reason, ‘Since’ date (when the failure appeared the first time) and ‘Repro’ date (when the last failure was discovered) help to prioritize the bugs and focus on the ones that need most of the tester’s attention.
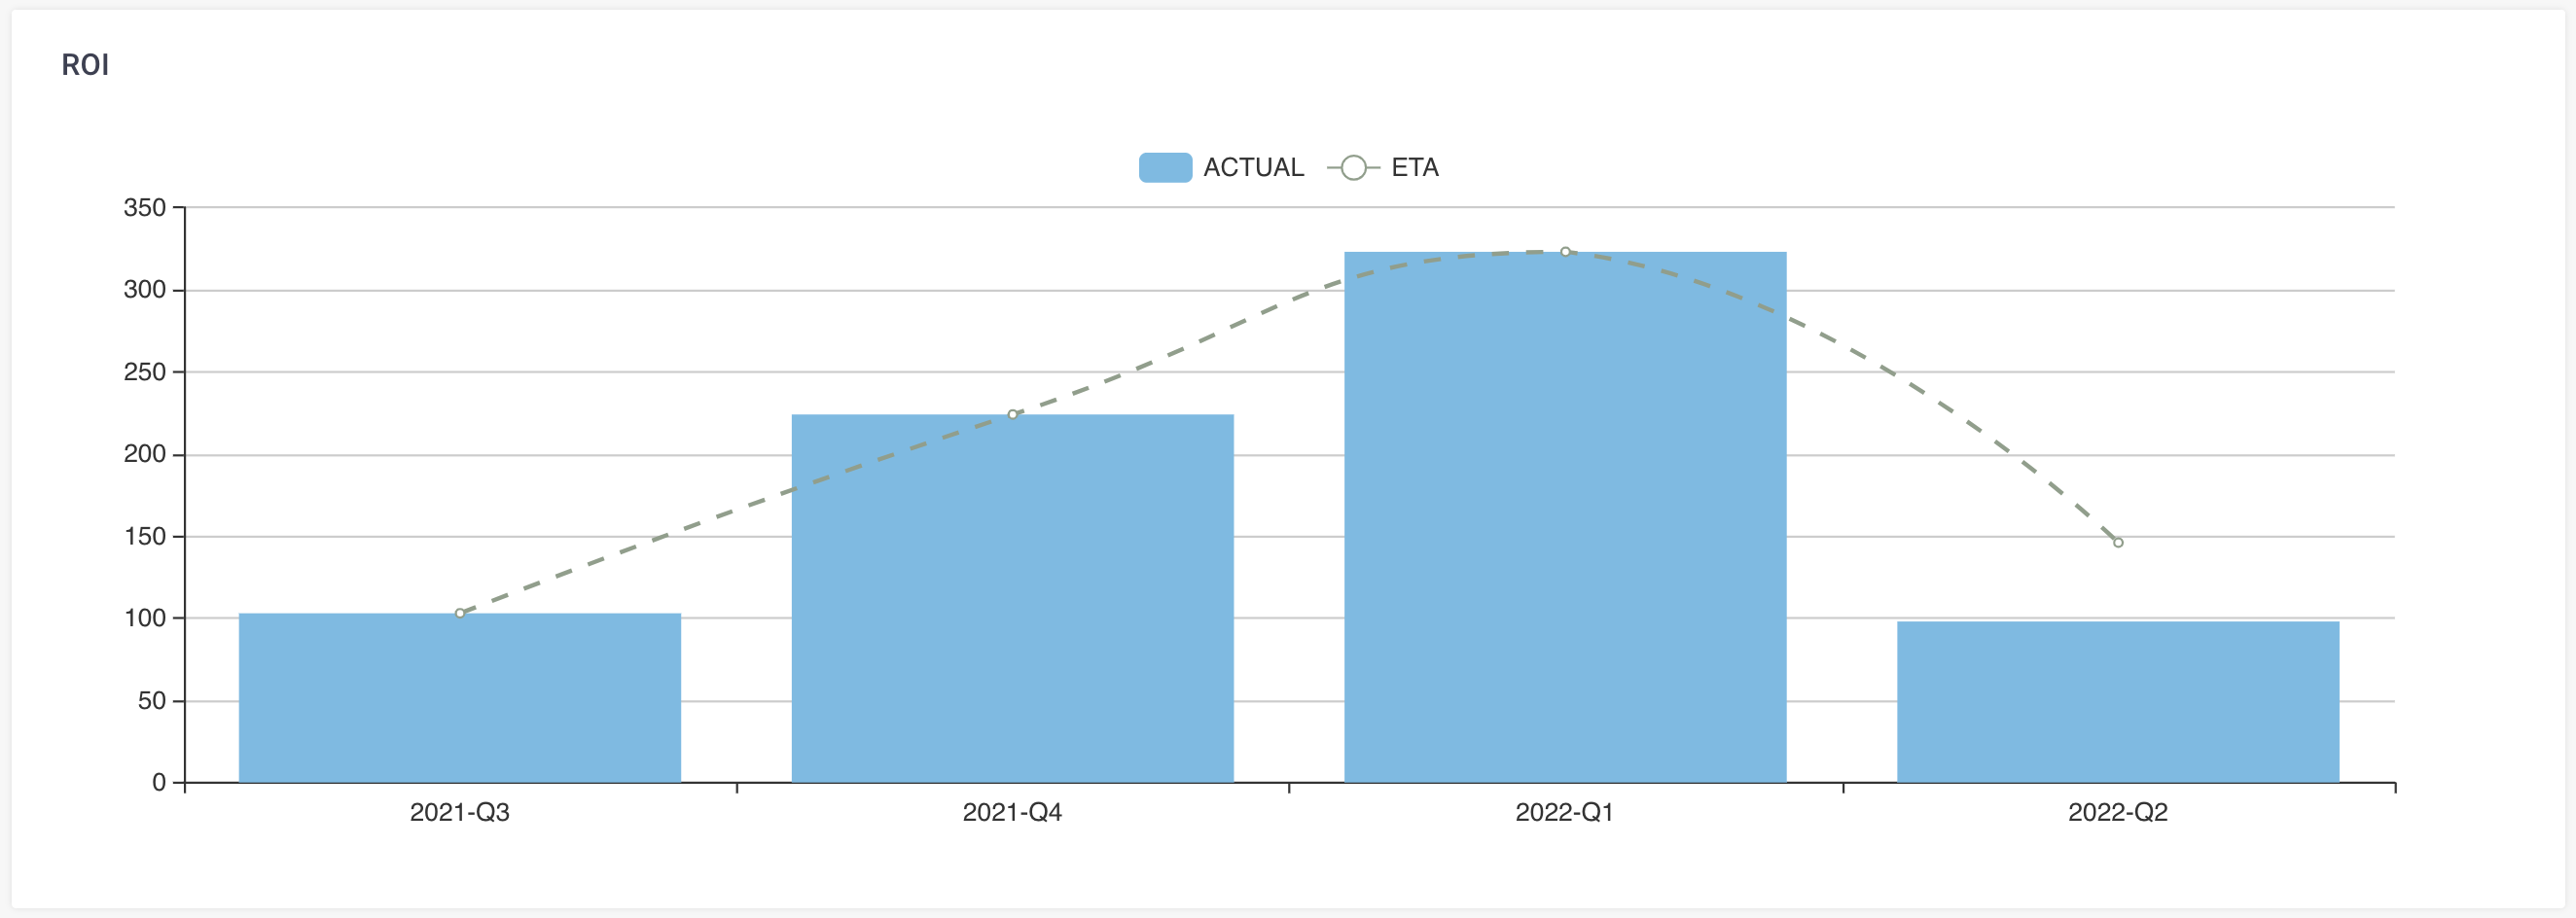
- Engineering performance widgets
-
Engineering performance widgets allow project managers to track the project ROI, and personal statistics per each user (e.g. how many bugs were detected).
Working with dashboards#
All the dashboards within the chosen project can be managed from Dashboards grid. You can access it by clicking the Dashboards icon in the navigation sidebar. It is also possible to see the list of your recently visited dashboards by hovering over the Dashboards icon and open all dashboards from there as well.
Info
You need to be a project Administrator/Manager or Admin of the workspace to have the ability to manage dashboards
Creating a dashboard#
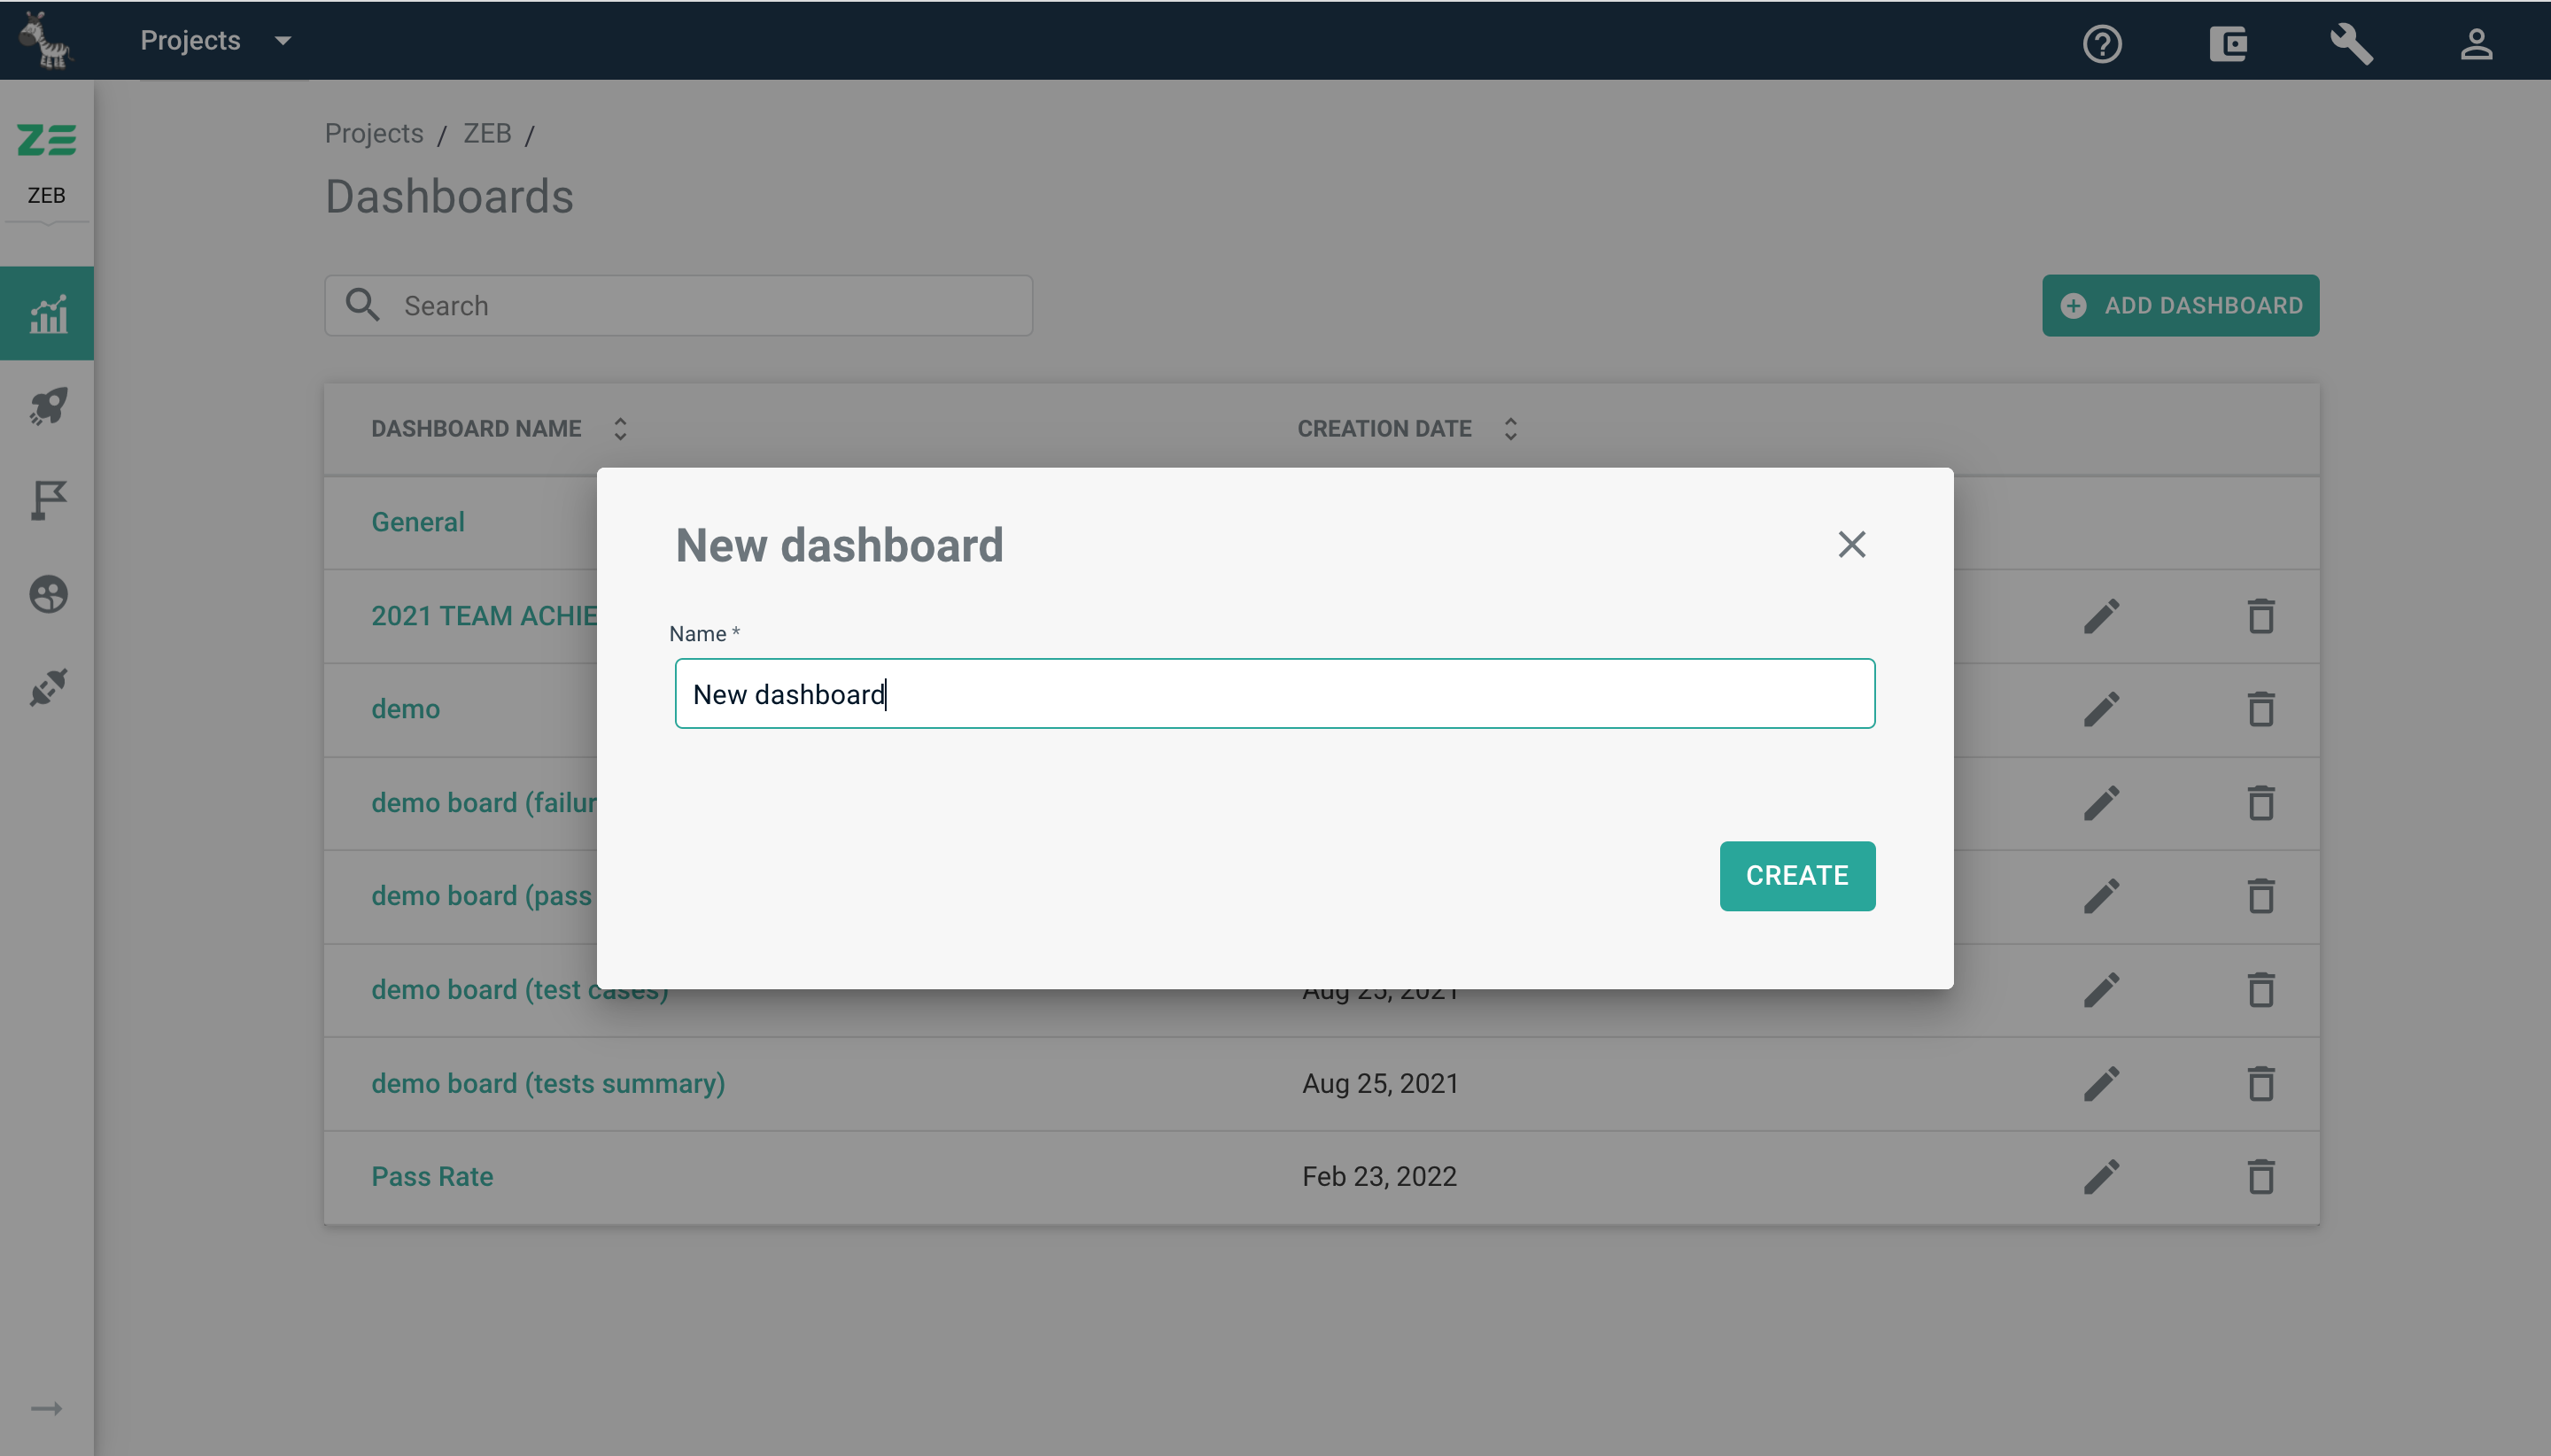
To add a new dashboard to a project, perform the following steps:
- Access the Dashboards grid via the navigation sidebar
- Click Add dashboard
- The New dashboard dialogue will appear
- Enter the name of the new dashboard
- Click Create
Right after that, you’ll be redirected to the newly created dashboard. You can add widgets now.
Renaming a dashboard#
To rename a dashboard, perform the following steps:
- Access the Dashboards grid via the navigation sidebar or the recent dashboards popup
- To the right of the dashboard you’d like to edit, click Edit
- Change the dashboard name in the opened dialogue
- Click Save
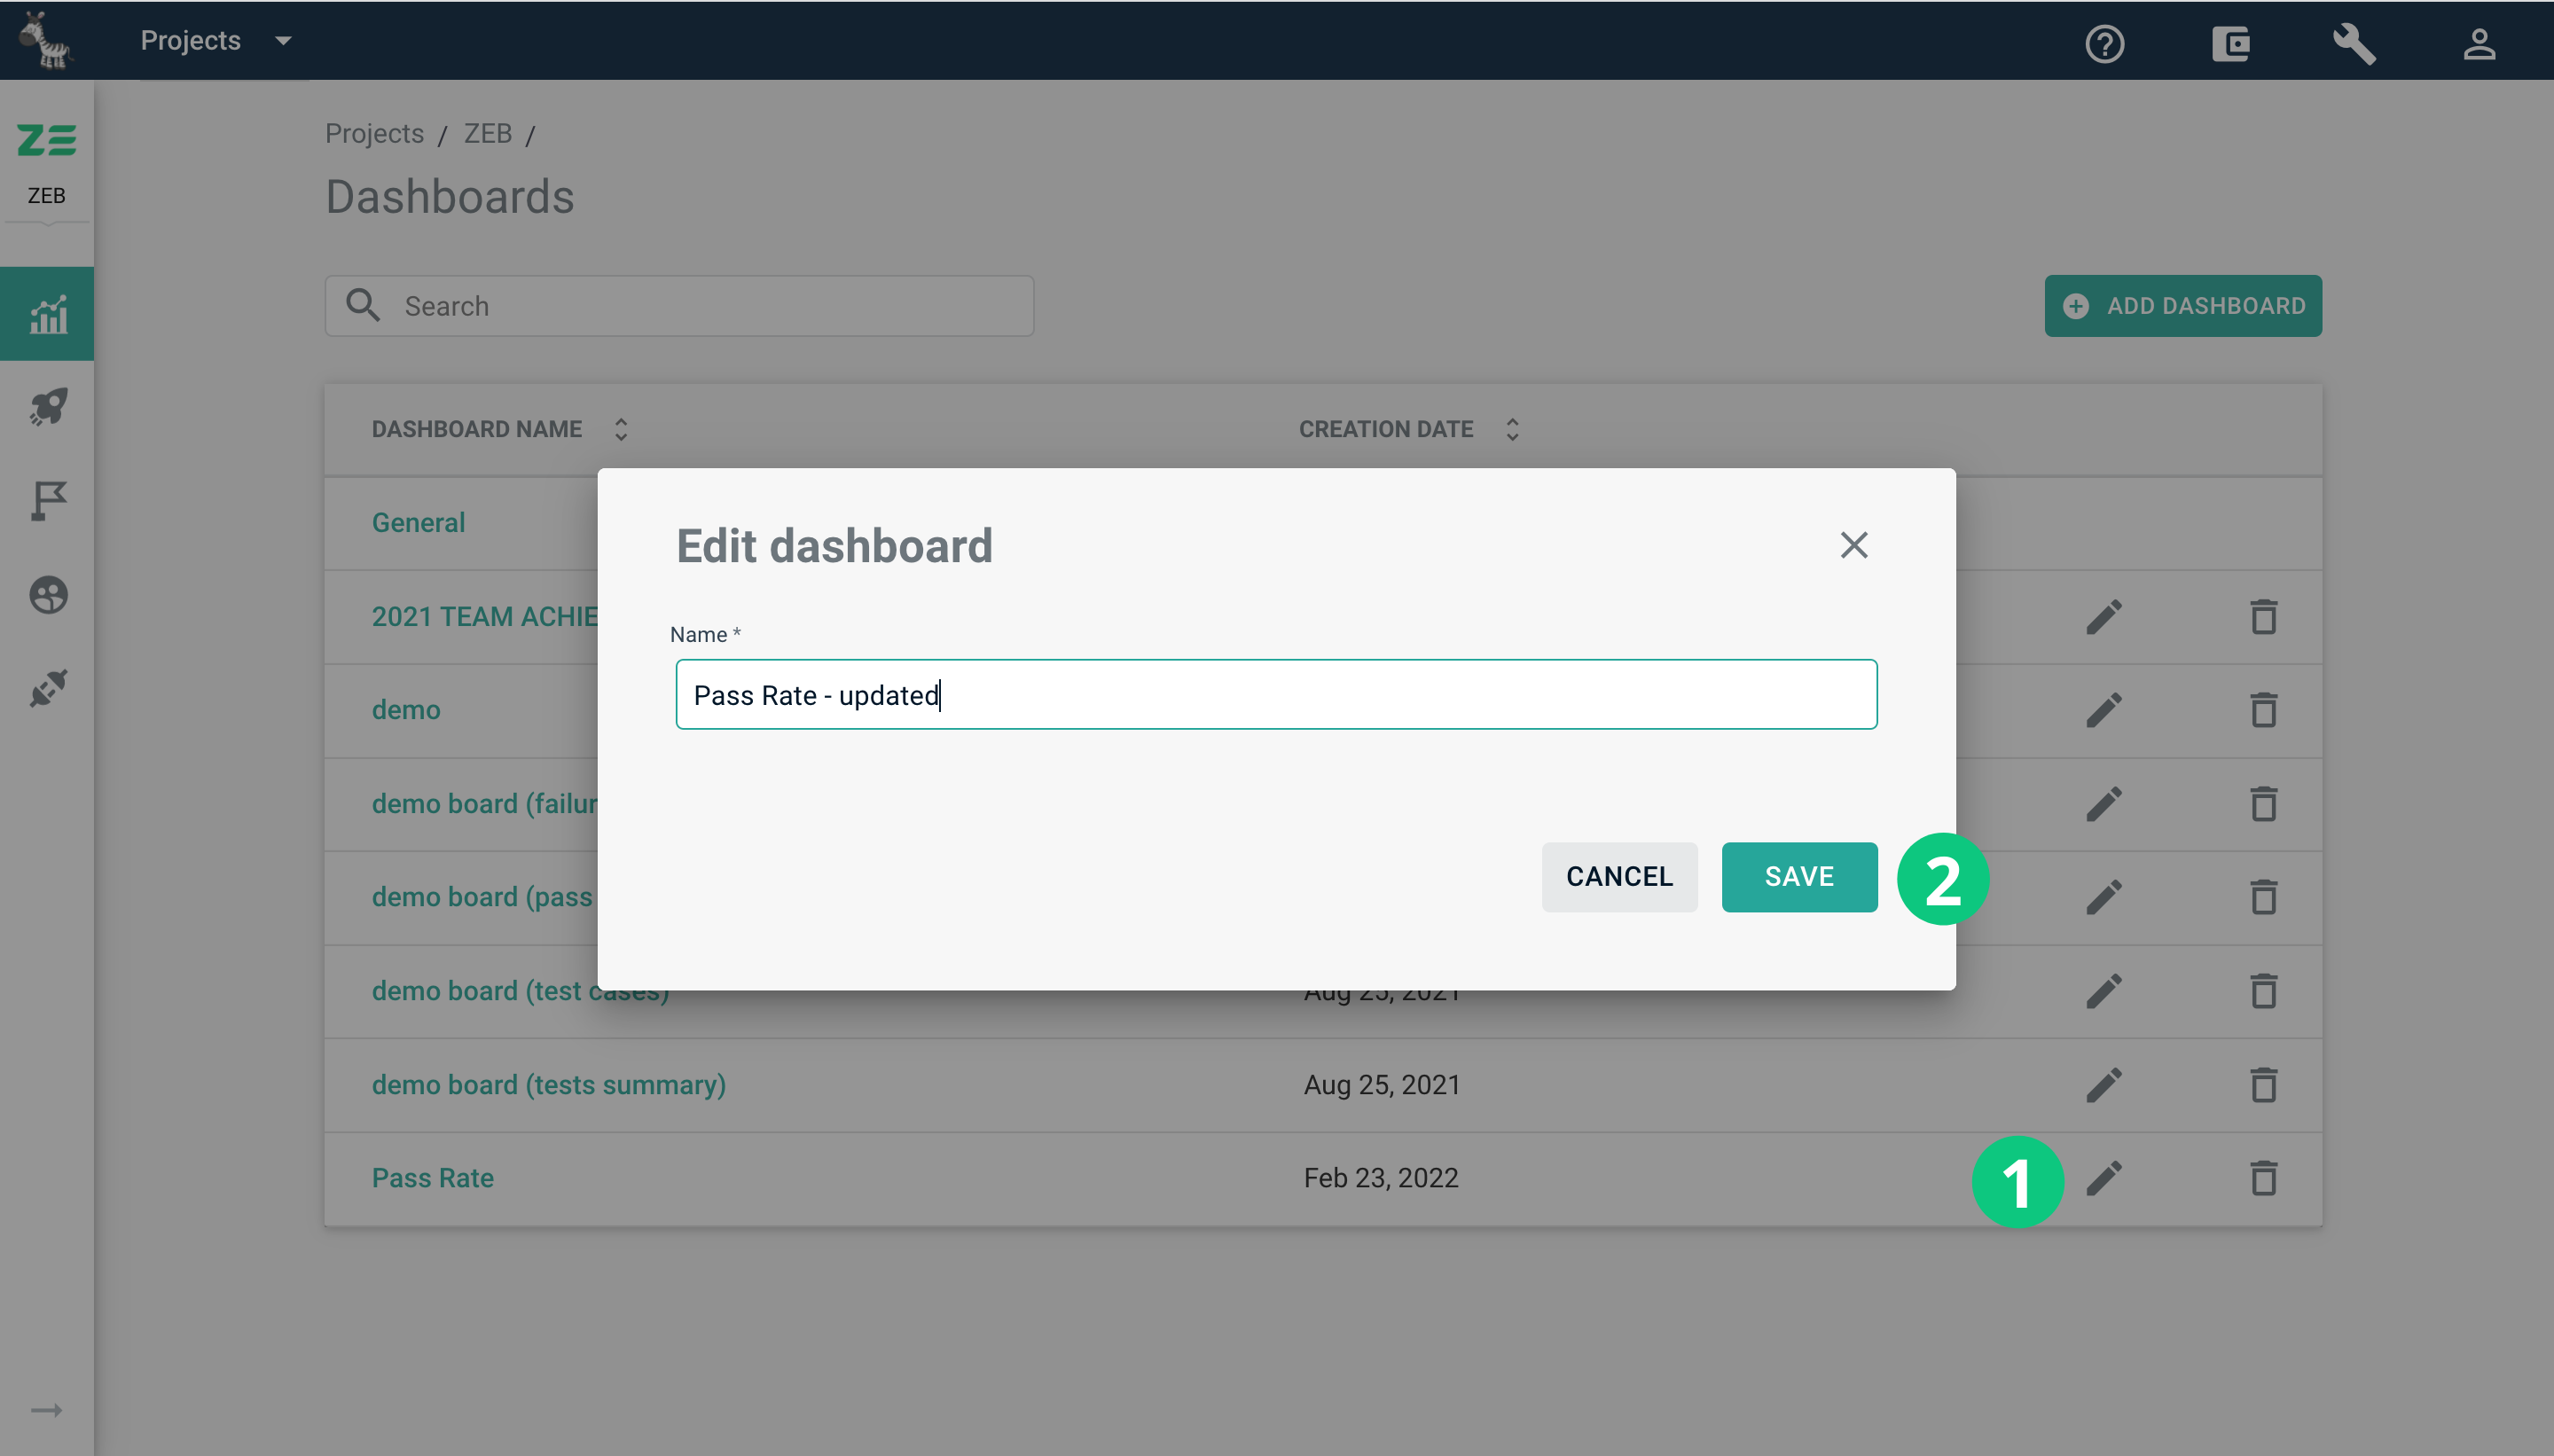
You can also perform this action while being on the needed dashboard. Just click Edit at the top-right corner of the page and provide a new dashboard name.
Deleting a dashboard#
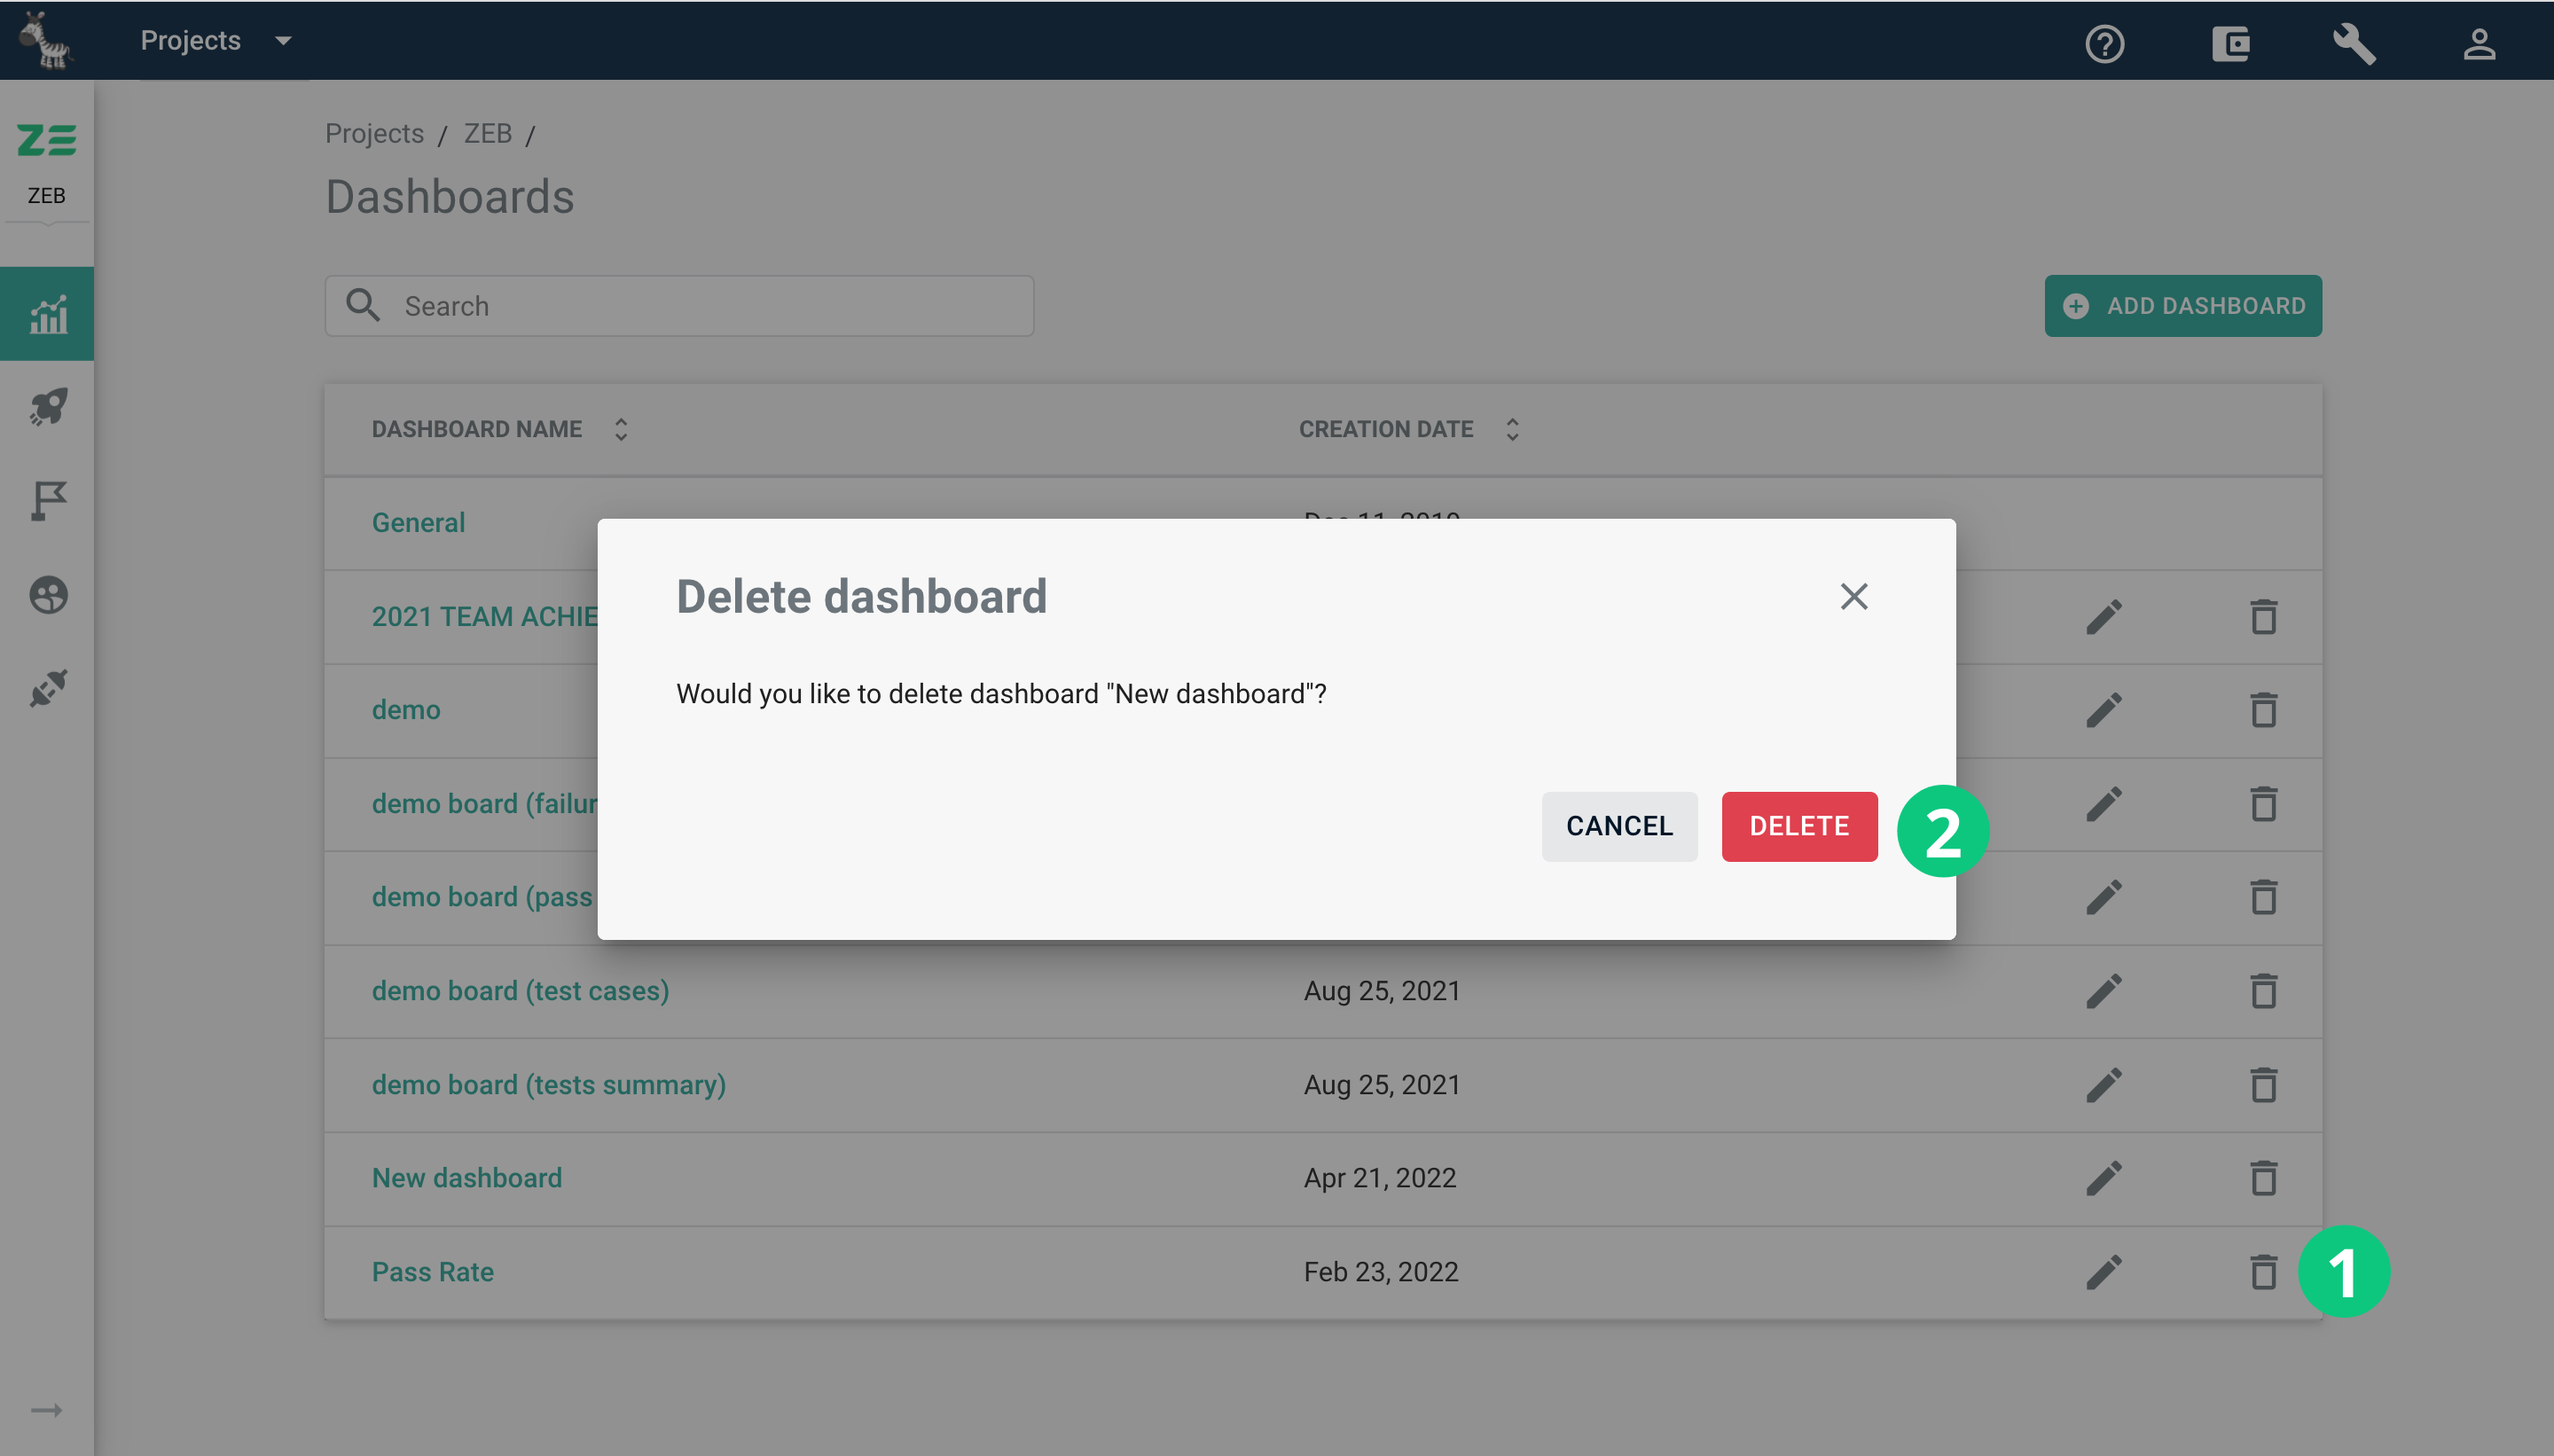
To delete a dashboard, perform the following steps:
- Access the Dashboards grid via the navigation sidebar or the recent dashboards popup
- To the right of the dashboard you’d like to delete, click Delete
- Click Delete in the Delete dialogue
The dashboard will be removed from the list.
Info
You cannot delete system dashboards
Working with widgets#
You can create and manage widgets on every dashboard except for the system ones.
Info
You need to be a project Administrator/Manager or Admin of the workspace to have the ability to manage widgets
Creating a widget#
To add a new widget to a dashboard, perform the following steps:
- Open the dashboard where you’d like to add a widget
- Click +NEW WIDGET in the top-right corner of the dashboard
- The Choose template dialogue will appear
- Select the needed widget
- Click Next
- Choose the period for the widget to display
- Click Refresh and Show more to see the advanced filers for your widget
- Click Next, enter the name and description of the future widget
- Click Add
The created widget will be added to the dashboard. You can then resize it or change its location on the dashboard.
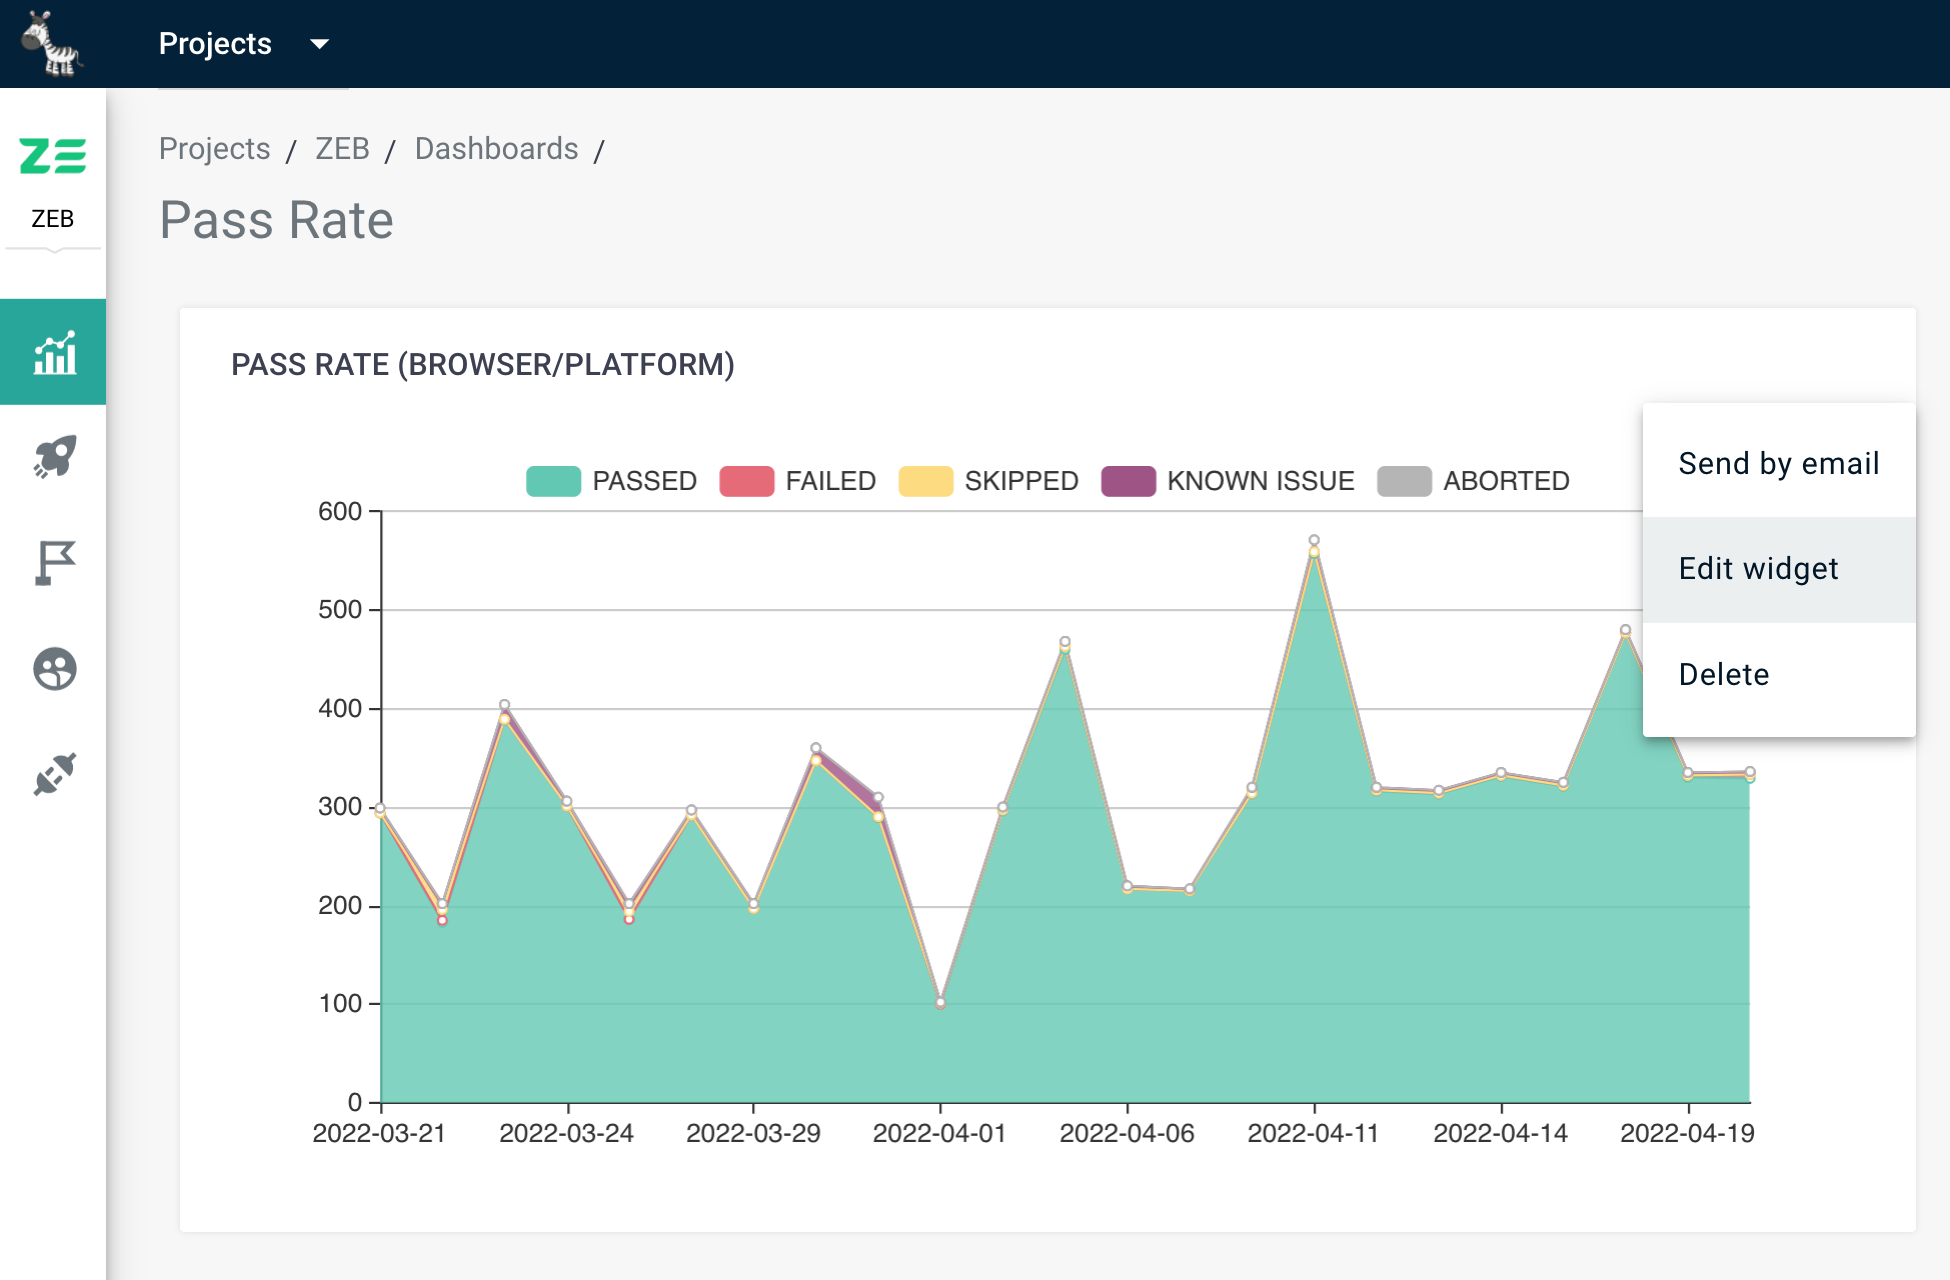
Editing a widget#
To edit a widget, perform the following steps:
- Open the dashboard with a widget to edit
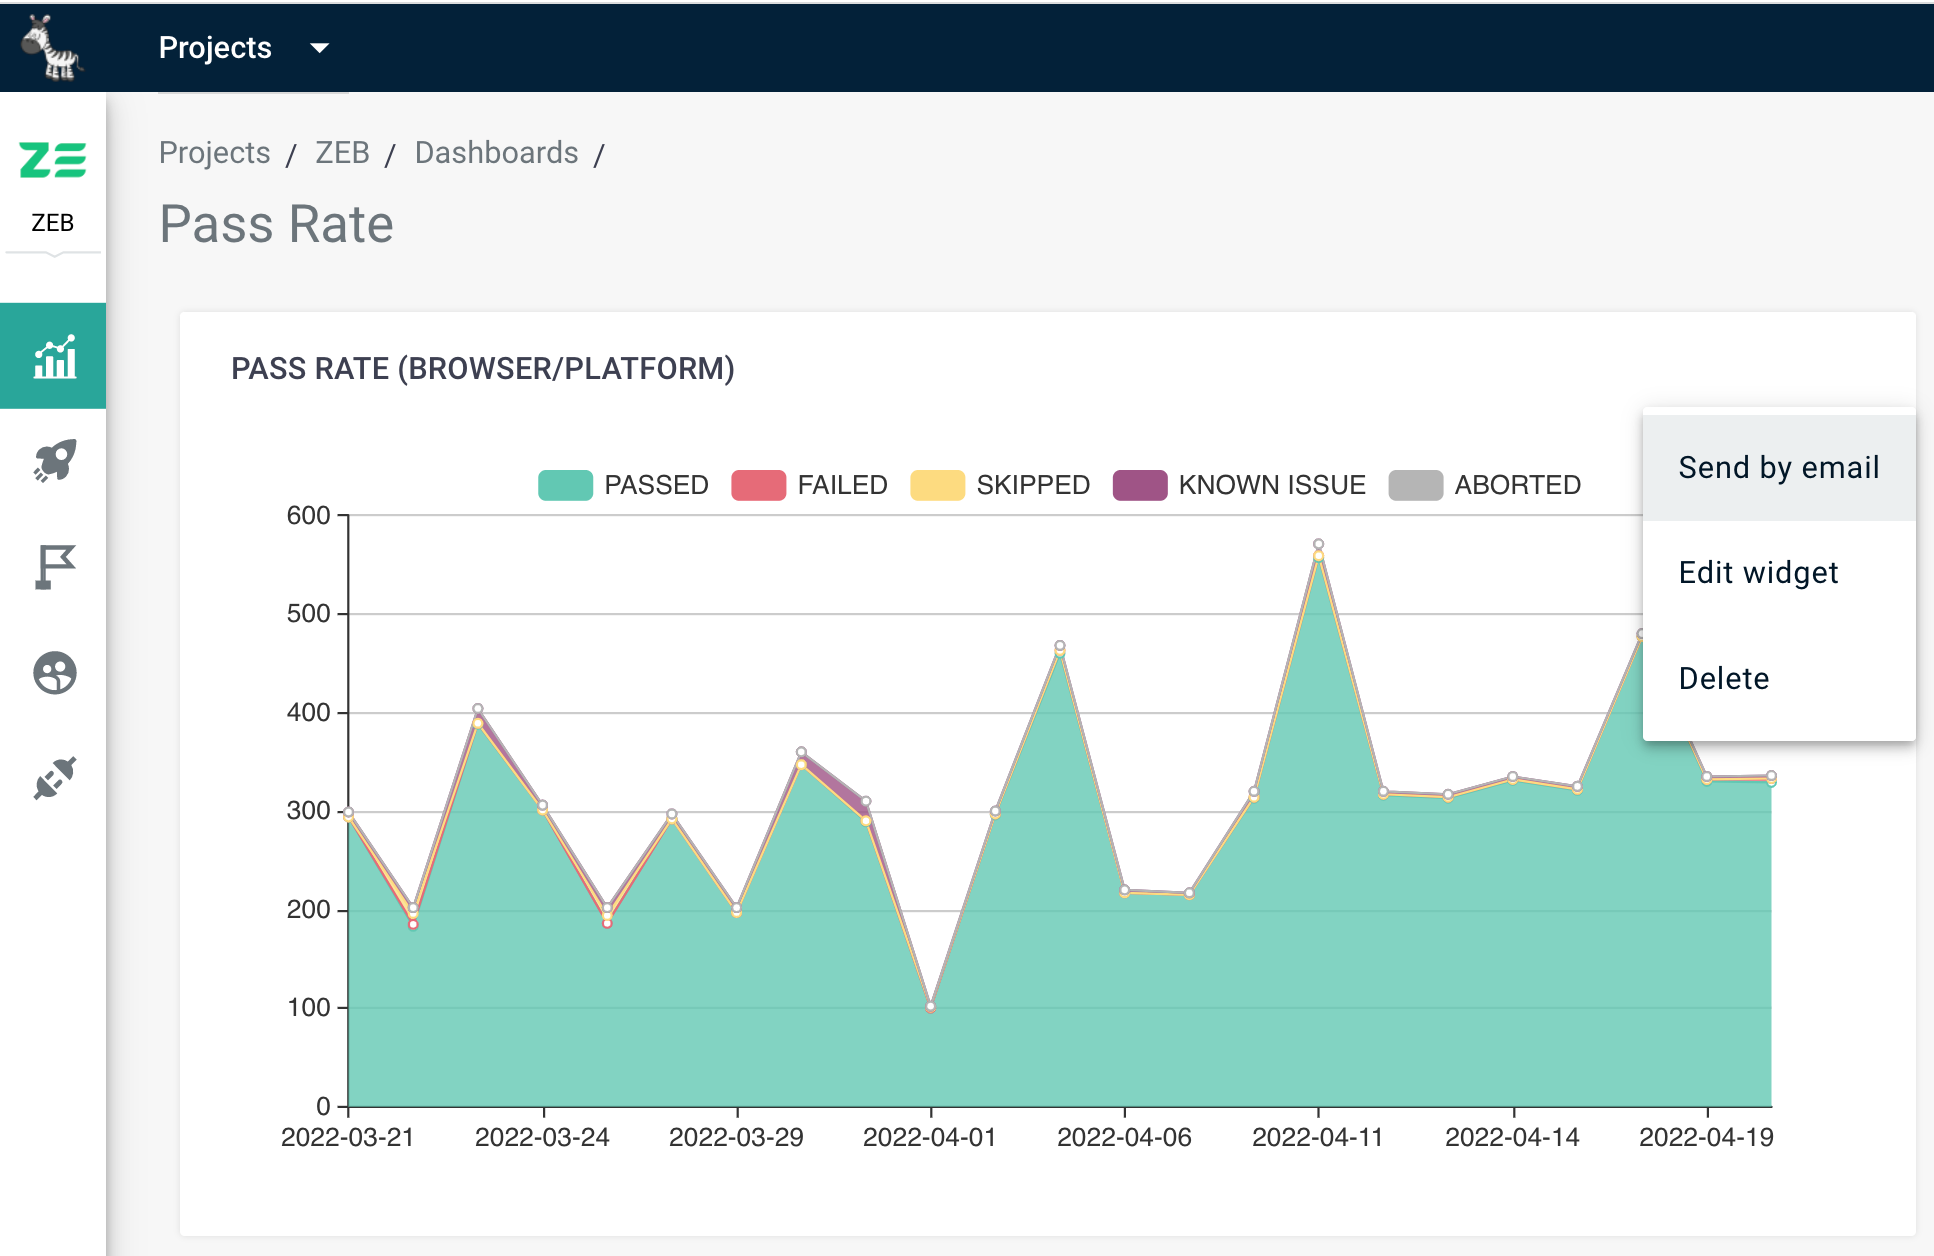
- Click More Options in the upper-right corner of the widget
- Select Edit widget
- Apply the necessary changes to the widget in the opened dialogue
- Click Save
Positioning widgets#
While managing a dashboard, you may want to resize a widget or change its lovation on a dashboard.
To do this, perform the following steps:
- Open the dashboard with a widget to reposition
- Click Widget positioning icon in the upper-right corner of the page
- To change the widget size, hover the mouse cursor over the widget. The system will show resizing arrows. Grab the arrow with the cursor and drag it to the desired width and height
- To change the widget location, drag and drop a widget to the needed position. When you move the widget to the area with enough space, the system marks this place with a dotted line
- Press Apply
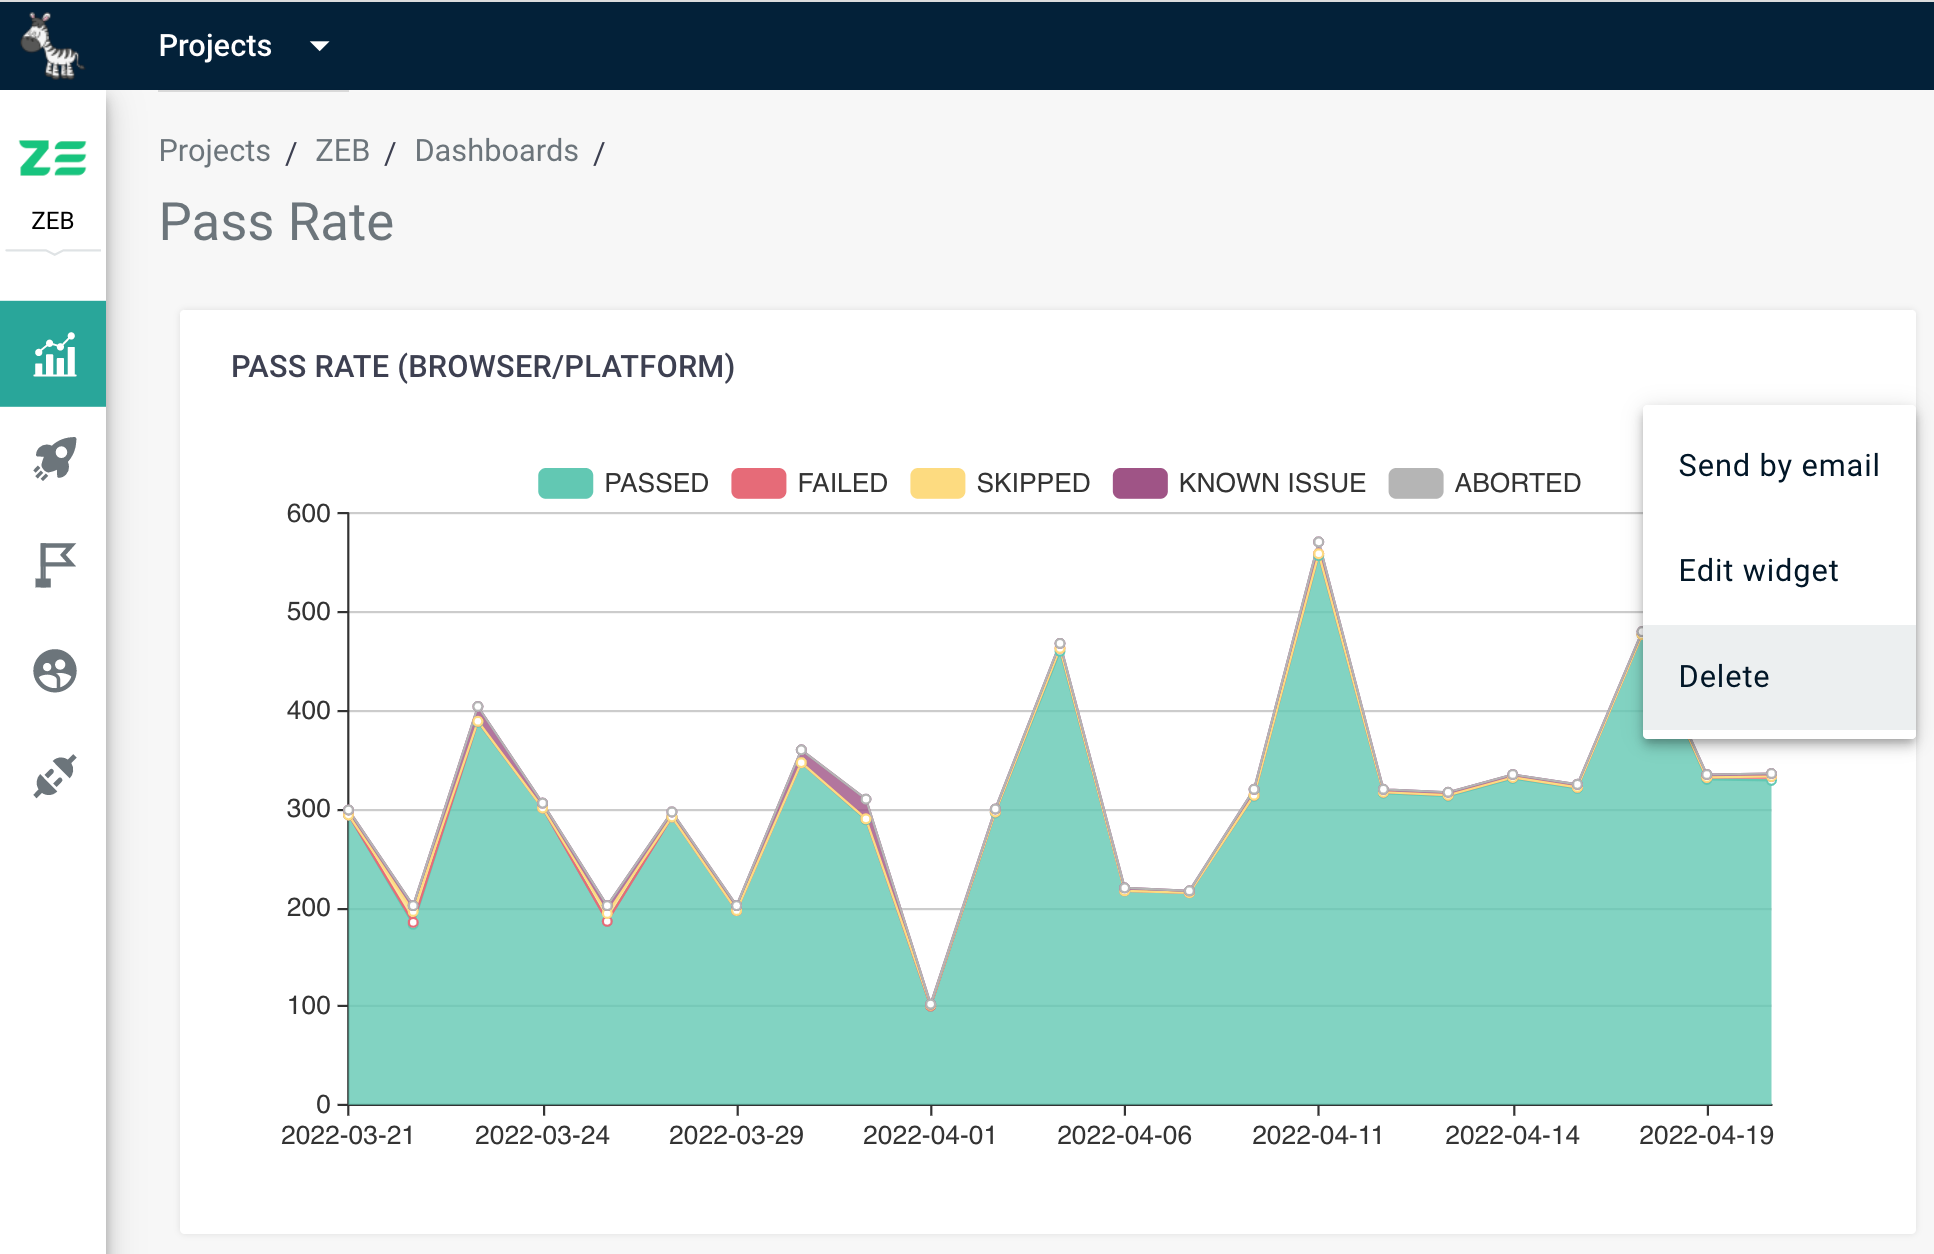
Deleting a widget#
To remove a widget from a dashboard, perform the following steps:
- Open the dashboard with a widget to delete
- Click More Options in the upper-right corner of a widget
- Select Remove from dashboard
The widget will be removed from the dashboard, but the information will not be lost. You can create a new widget with the same configurations anytime.
Sharing reports#
Any workspace user can share dashboards and widgets by email in public projects. Any project member can do this in private projects.
Sharing a dashboard#
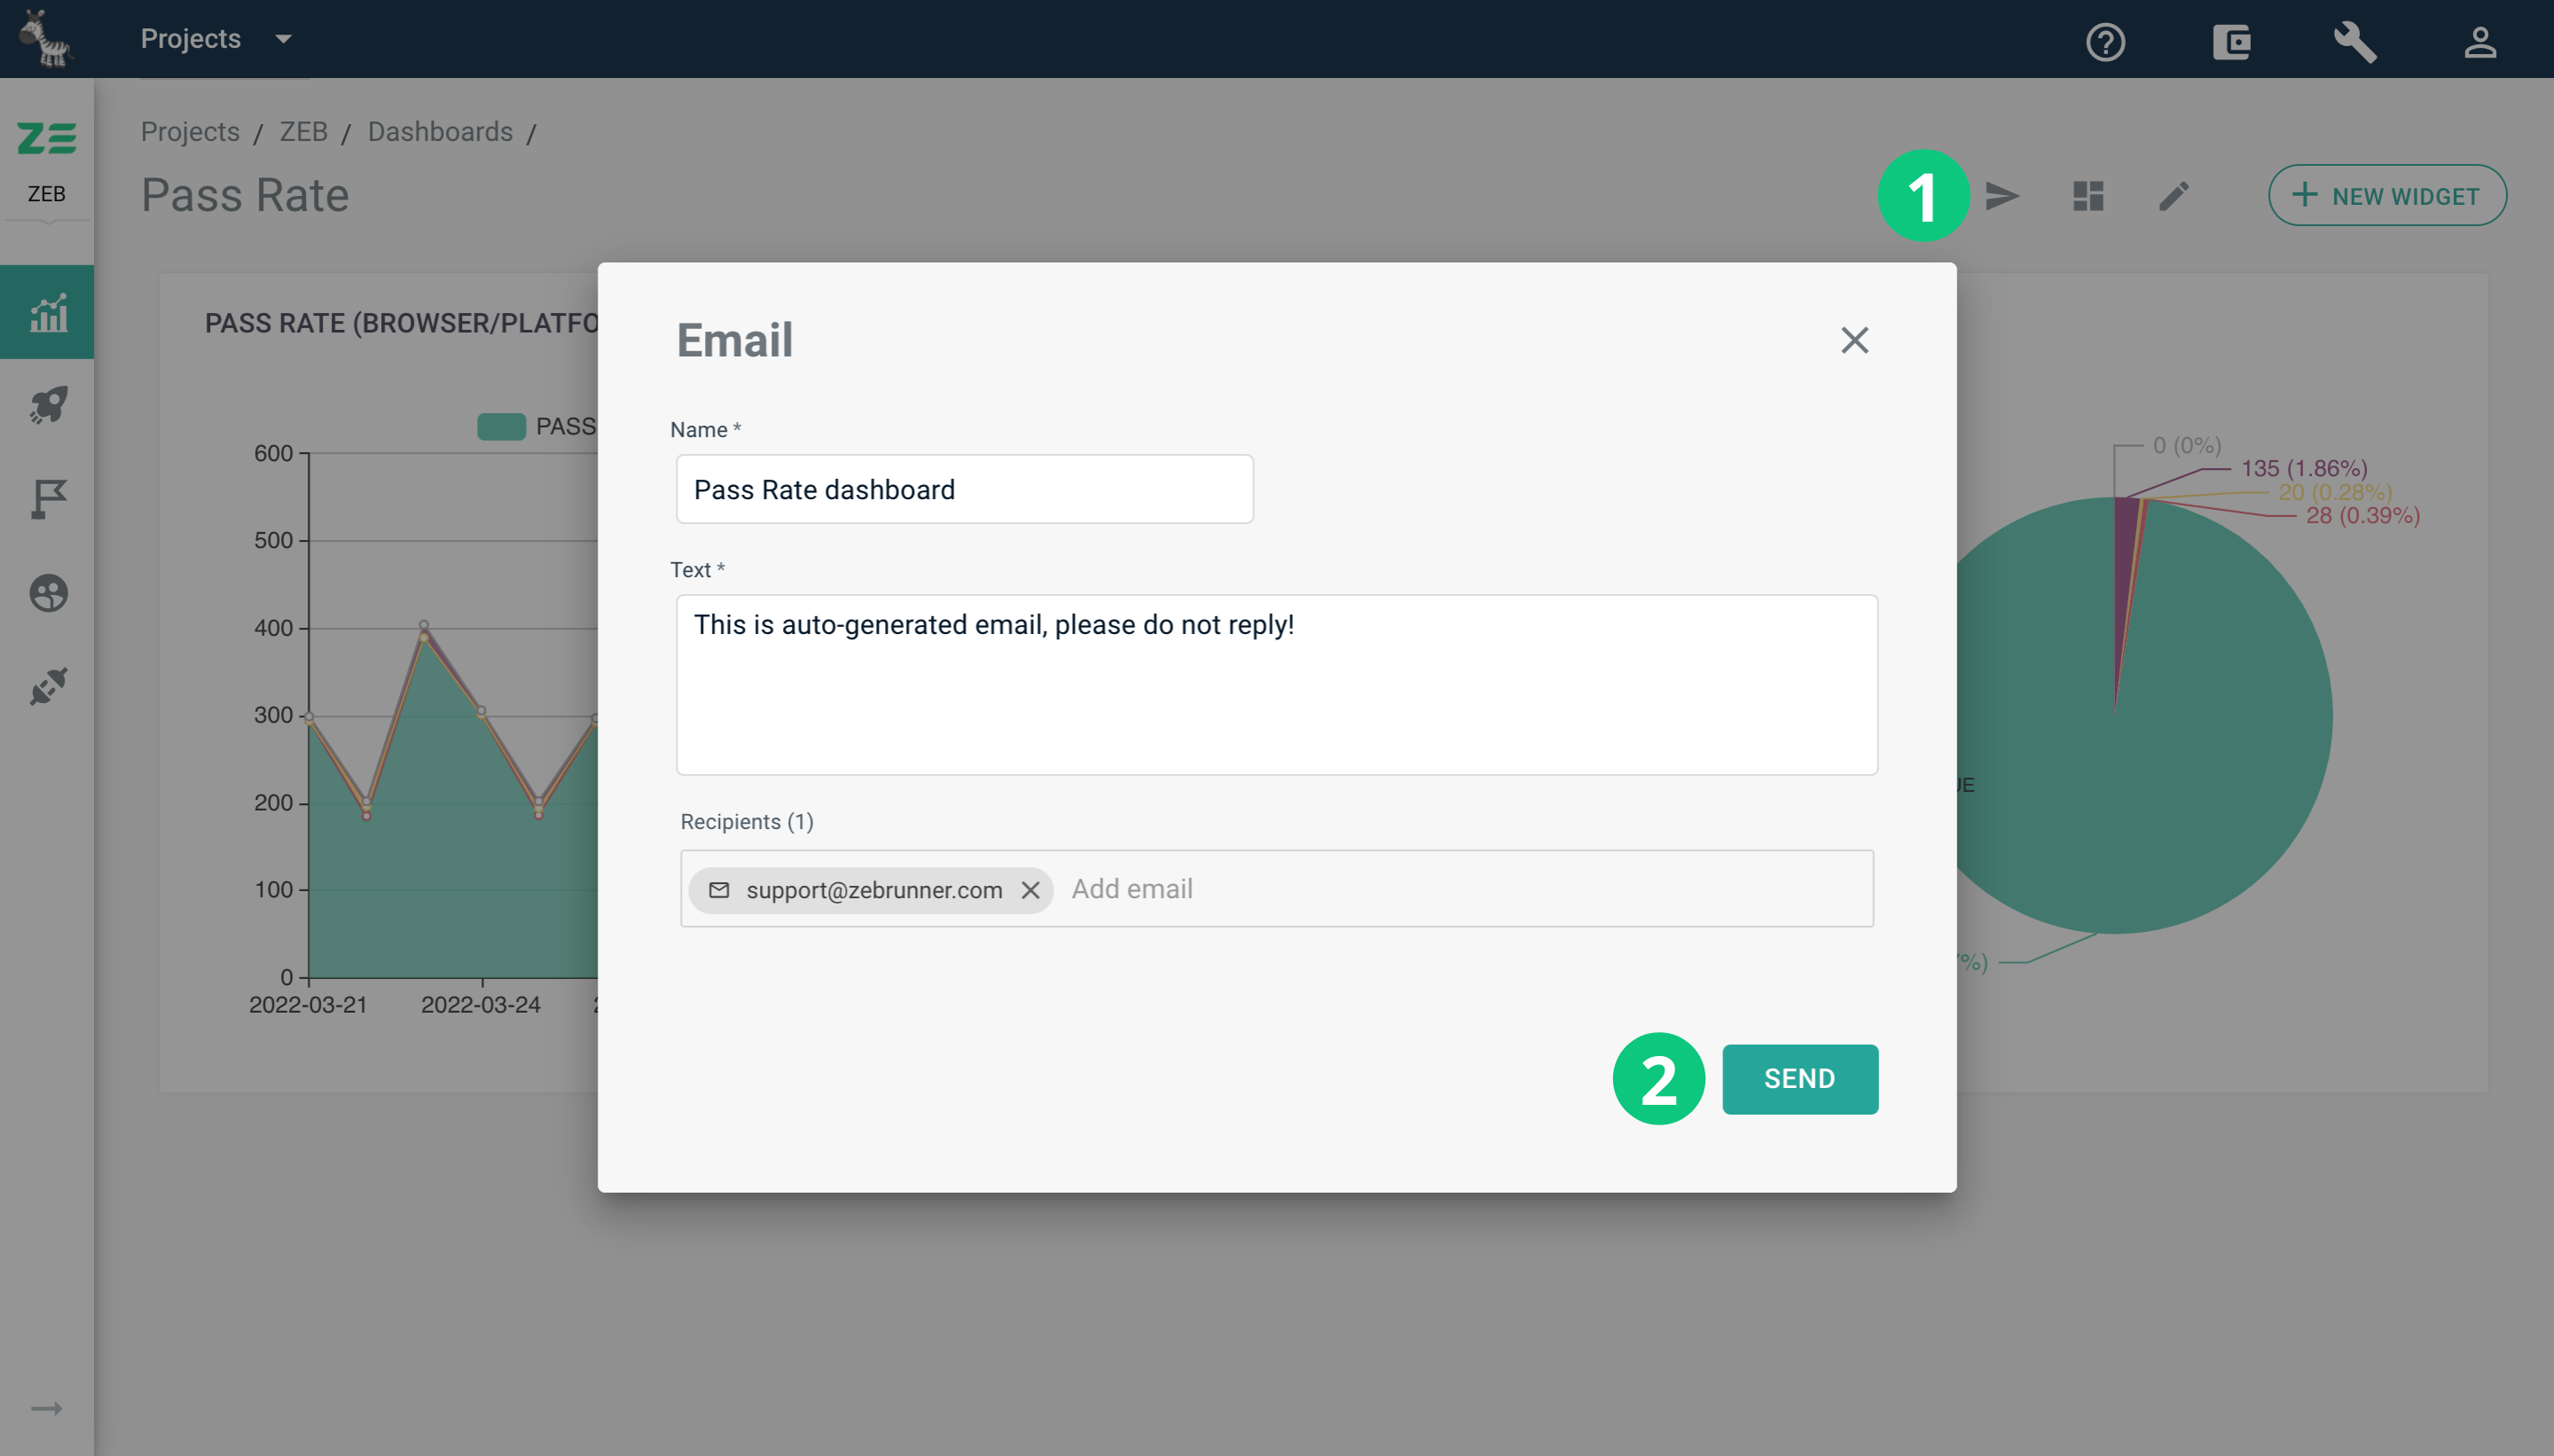
To send a dashboard by email, perform the following steps:
- Open the dashboard to share
- Click Send by email icon in the upper-right corner of the page
- The sharing dialogue will appear
- Enter recepient's emails (you can enter multiple at once) and a message (if needed)
- Click Send
The email will be sent to the provided email address(es).
Sharing a widget#
To send a widget by email, perform the following steps:
- Open the dashboard with a widget to send by email.
- Click More Options in the upper-right corner of the widget and select Send by email
- The sharing dialogue will appear
- Enter recepient's emails (you can enter multiple at once) and a message (if needed)
- Click Send
The email will be sent to the provided email address(es).